
Overview
在我們建立 Proxmox 的環境後,我們打算為伺服器增加儲存空間,我們並沒有經驗在建置儲存、運算分離的伺服器系統,同時也因為需要克服硬碟 I/O 和速度的問題,因此打算直接在本機當中新增實體硬碟。After we deploy a Proxmox server for a few months. We decided to add more storage to our server. As we don’t have any experience to build a storage-separate server and also due to the high hard disk I/O of remote storage. So, we chose to add an extra hard drive on the server.
增加第二顆以上的 Proxmox 硬碟時你需要… To install an extra hard drive you should follow the below step.
STEP1. 在電腦上裝上硬碟 Install Hard Drive.
STEP2. 辨識硬碟路徑 Identify Hard Drive and Path.
STEP3. 劃分磁碟分區 Create Hard Disk Partition
STEP4. 格式化所劃分的分區 Format Partition
STEP5. 將硬碟掛載到 Linux 系統路徑中 Mount Hard Disk
STEP6. 在 Proxmox 中掛載硬碟系統 Adding a Storage in Proxmox
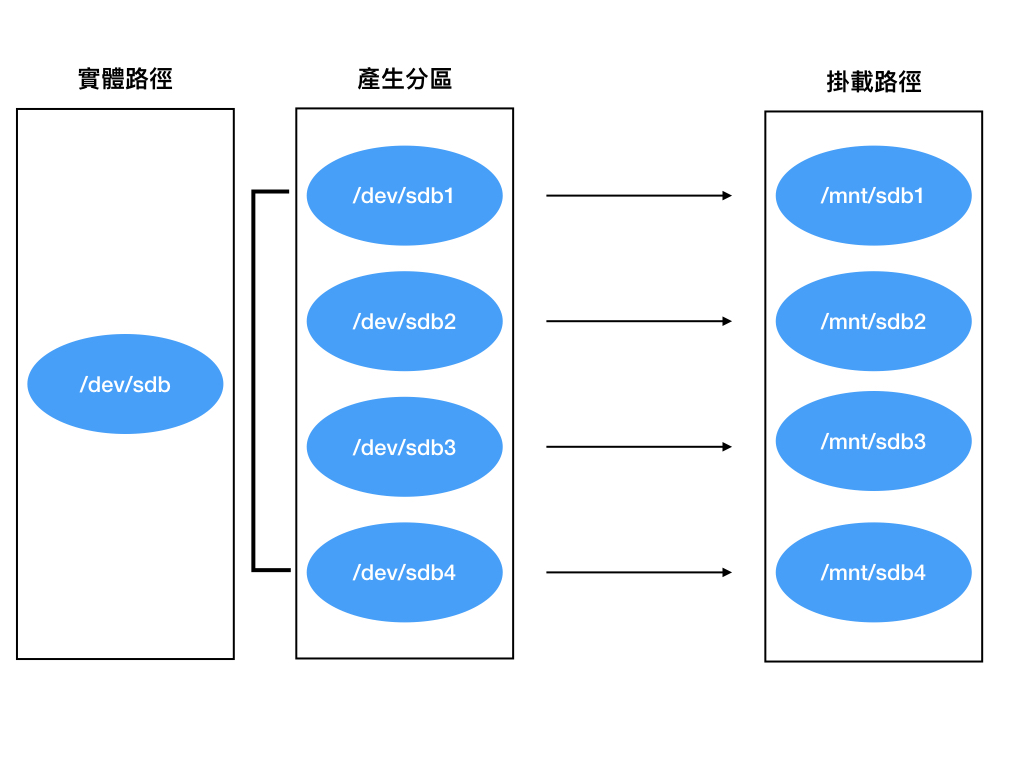
TIPS: Linux 的硬碟運作方式分為三個步驟 Linux HD working with this three step.
我會一步一步進行教學 I will setup a new drive step by step.

1. 實體硬碟 Phycial HD
2. 切割後的磁區 Partition
3. 掛載後的資料夾 Mount Folder
STEP1. Install Hard Drive.
先安裝第二顆硬碟到機器當中 To add a second hard drive to Proxmox, you should insert a new hard drive to your server first.
STEP2. Identify Hard Drive and Path.
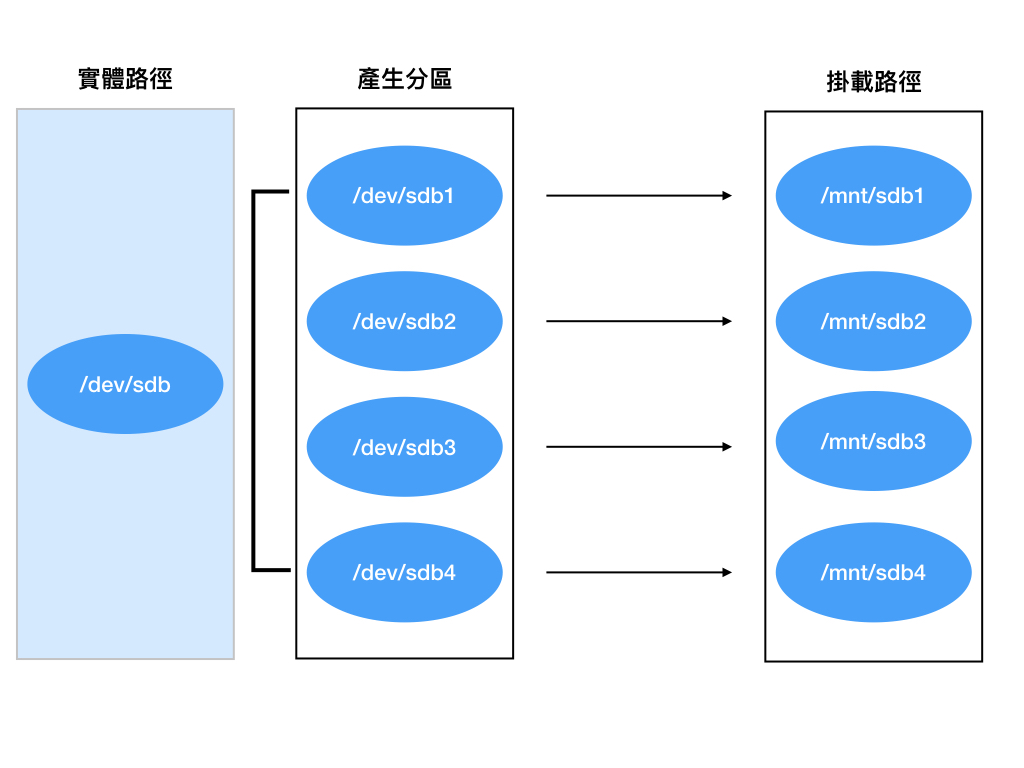
1. 實體硬碟 Phycial HD
接下來,辨識硬碟路徑 Second, identify which hard disk path we need to modify by using this command we can easier get HDD disc’s path.
SATA Drive:
ls /dev/sd*
IDE (PATA Drive):
ls /dev/hd*
My hard disk is SATA Drive so I will enter “ls /dev/sd*” command to identify my hard drive.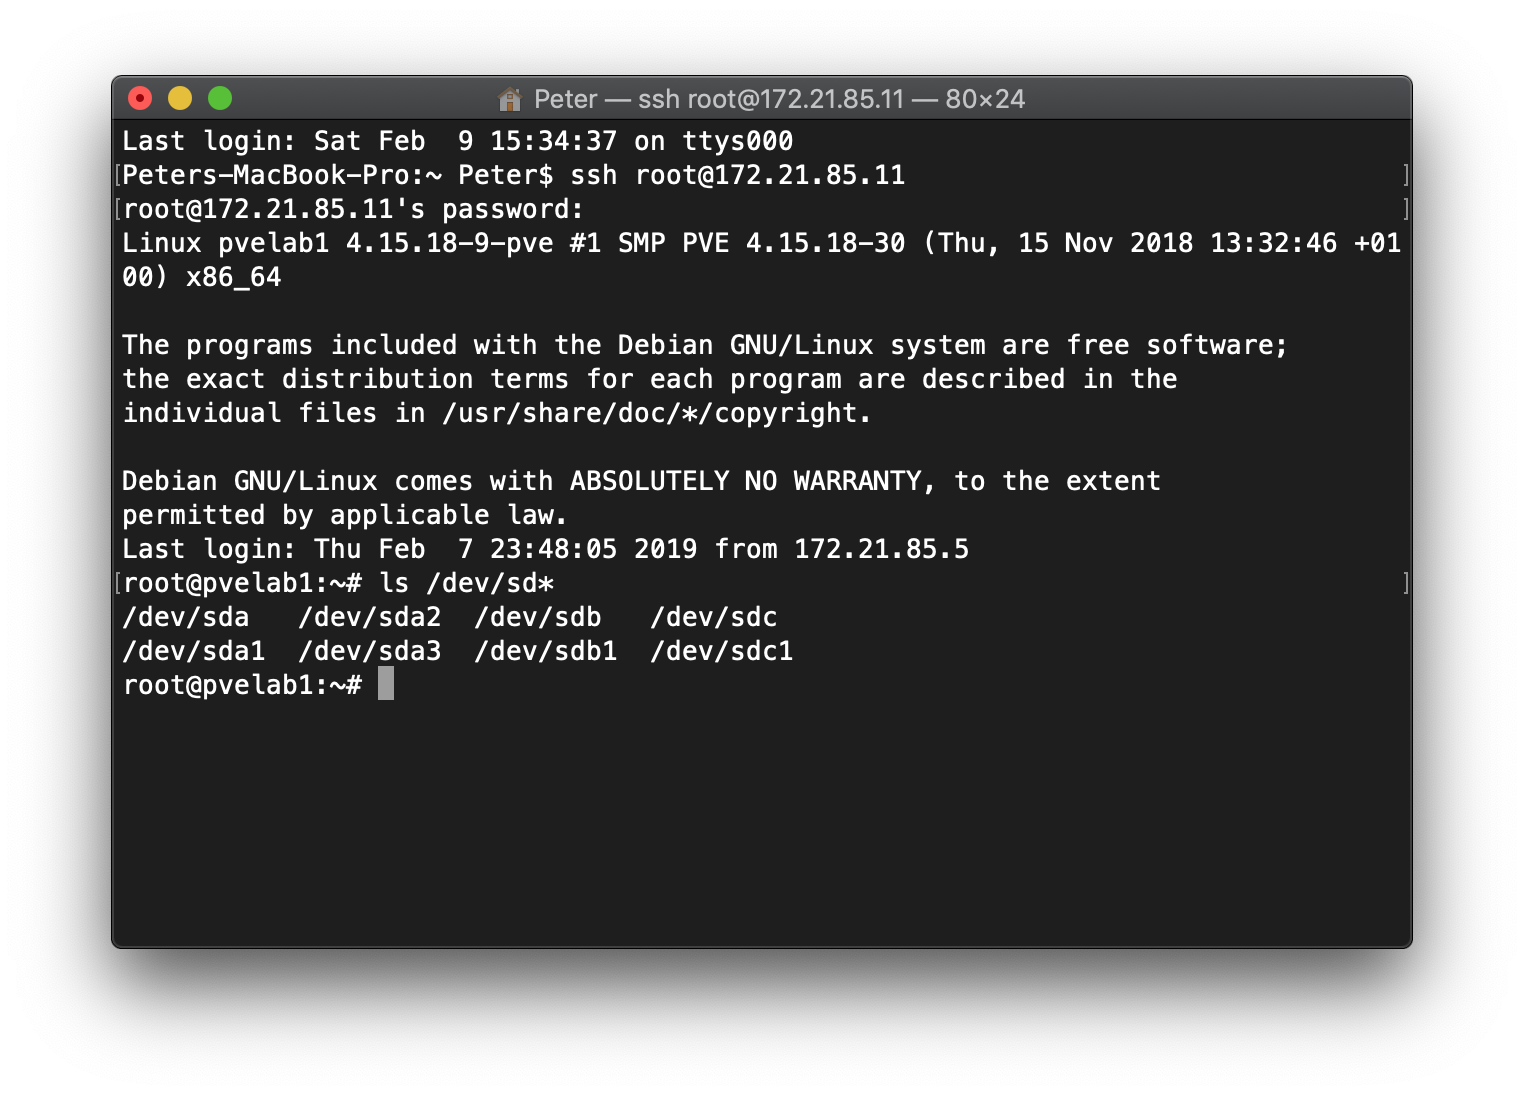 Letter after sd* is different hard drive
Numbers after sd* is different partition of the same hard drive
STEP3. Create Hard Disk Partition
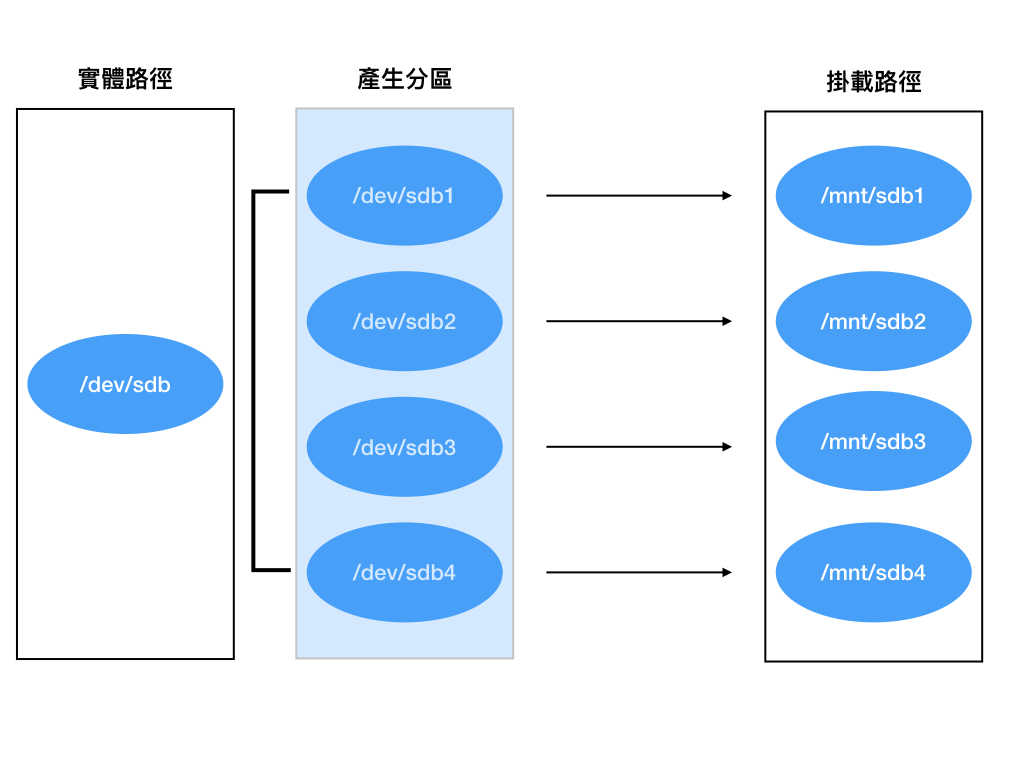
2. 切割後的磁區 Partition
TIPS: 在你開始格式化或是清除硬碟時,都一定要使用 "fsdisk" 的 "p" 指令再次確定你選擇正確的硬碟  Before you start to format any hard drive or delete any partition, you should confirm it by using "fsdisk" "p" command to check partition information.

選擇一顆硬碟來確認 Choose one drive for comfirm
fdisk /dev/sdb(硬碟路徑 HD PATH)

使用 p 指令檢查硬碟的空間,看是否符合 Using "p" command to comfirm hd information.
Command (m for help): p

現在可以使用硬碟容量或是 UDID 號碼來確認是否為欲操作的硬碟 Now command display about the space of storage and hard drive UDID, you can use those information to check is this hard drive that you are looking for.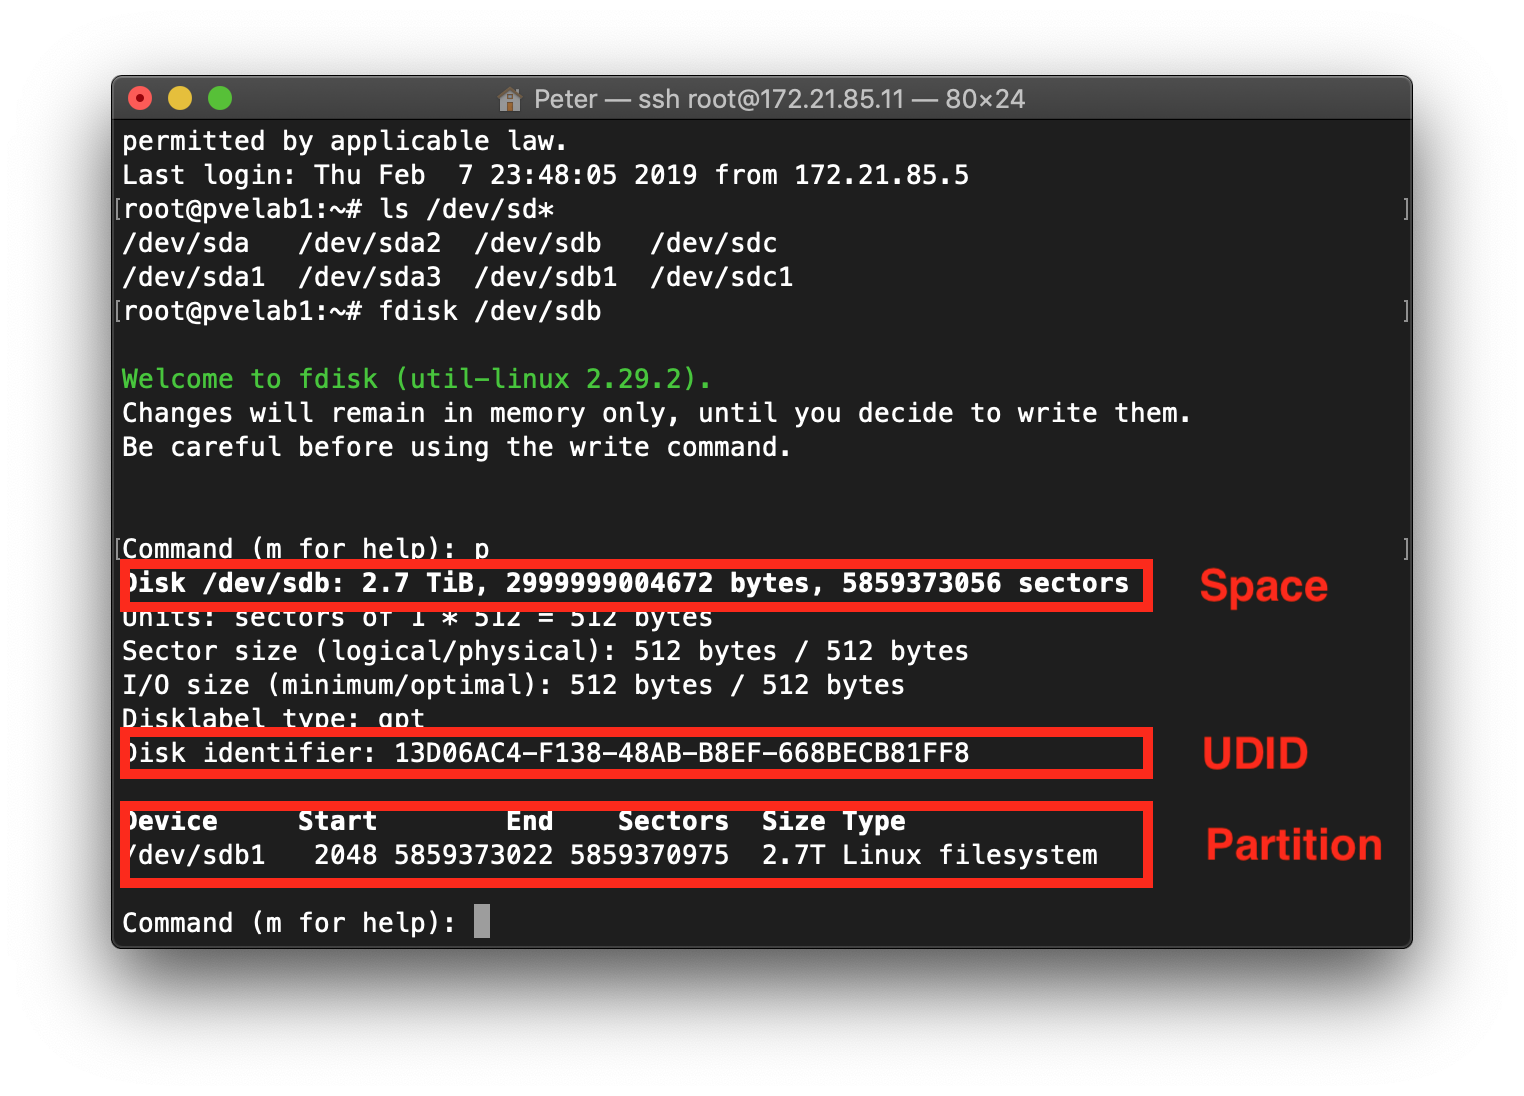
如果選擇不正確的硬碟,可以再次使用 “fdisk” 指令並重複第二步驟嘗試其他硬碟,當你確定你選在正確的硬碟後… If you had chosen the wrong disk, you can restart with “fdisk” command and follow step2 again. After you 100% sure that you are choosing the right disk…
Command (m for help): n
Select (default p): (直接按下enter)
Partition number (1-4, default 1): (直接按下enter)
First sector (2048-167772159, default 2048): (直接按下enter)
Last sector, +sectors or +size{K,M,G} (2048-167772159, default 167772159): (直接按下enter)
Command (m for help): w
等待一會,接下來你就會看到原本的硬碟路徑 /dev/sdb 變成 /dev/sdb1。 After a few minutes, you can found out /dev/sdb had changed to /dev/sdb1.
STEP4. Format Partition
格式化剛剛完成的硬碟路徑 Format the partition path we create by “fdisk”
mkfs -t ext3 /dev/sdb1(硬碟路徑 HD PATH)
STEP5.Mount Hard Disk on Linux
3. 掛載後的資料夾 Mount Folder這邊會先建立一格掛載路徑也就是圖片的藍底色處,在執行掛載(箭頭處) I will create a mount path in Linux(Blue background), and mount it second(arrow).
先建立路徑來給掛載使用 Creates a directory for mounting a hard drive.
mkdir -p /mnt/sdb1(名稱建議與實體名稱相同)
把掛載訊息寫入開機執行當中 Add a command to mount hard disk while booting.
echo /dev/sdb1(實體硬碟路徑) /mnt/sdb1(掛載硬碟路徑) ext3 defaults 1 2 >> /etc/fstab
重新開機 Reboot
reboot
檢查掛載狀態
df /mnt/sdb1(掛載硬碟路徑)
STEP6.Adding a Storage in Proxmox
Proxmox WebGUI > Datacenter > Storage > Directory
 ID: sdb1(隨意名稱)
Directory: /mnt/sdb1(掛載硬碟路徑)
Content: 全部選擇
Nodes: 全部選擇
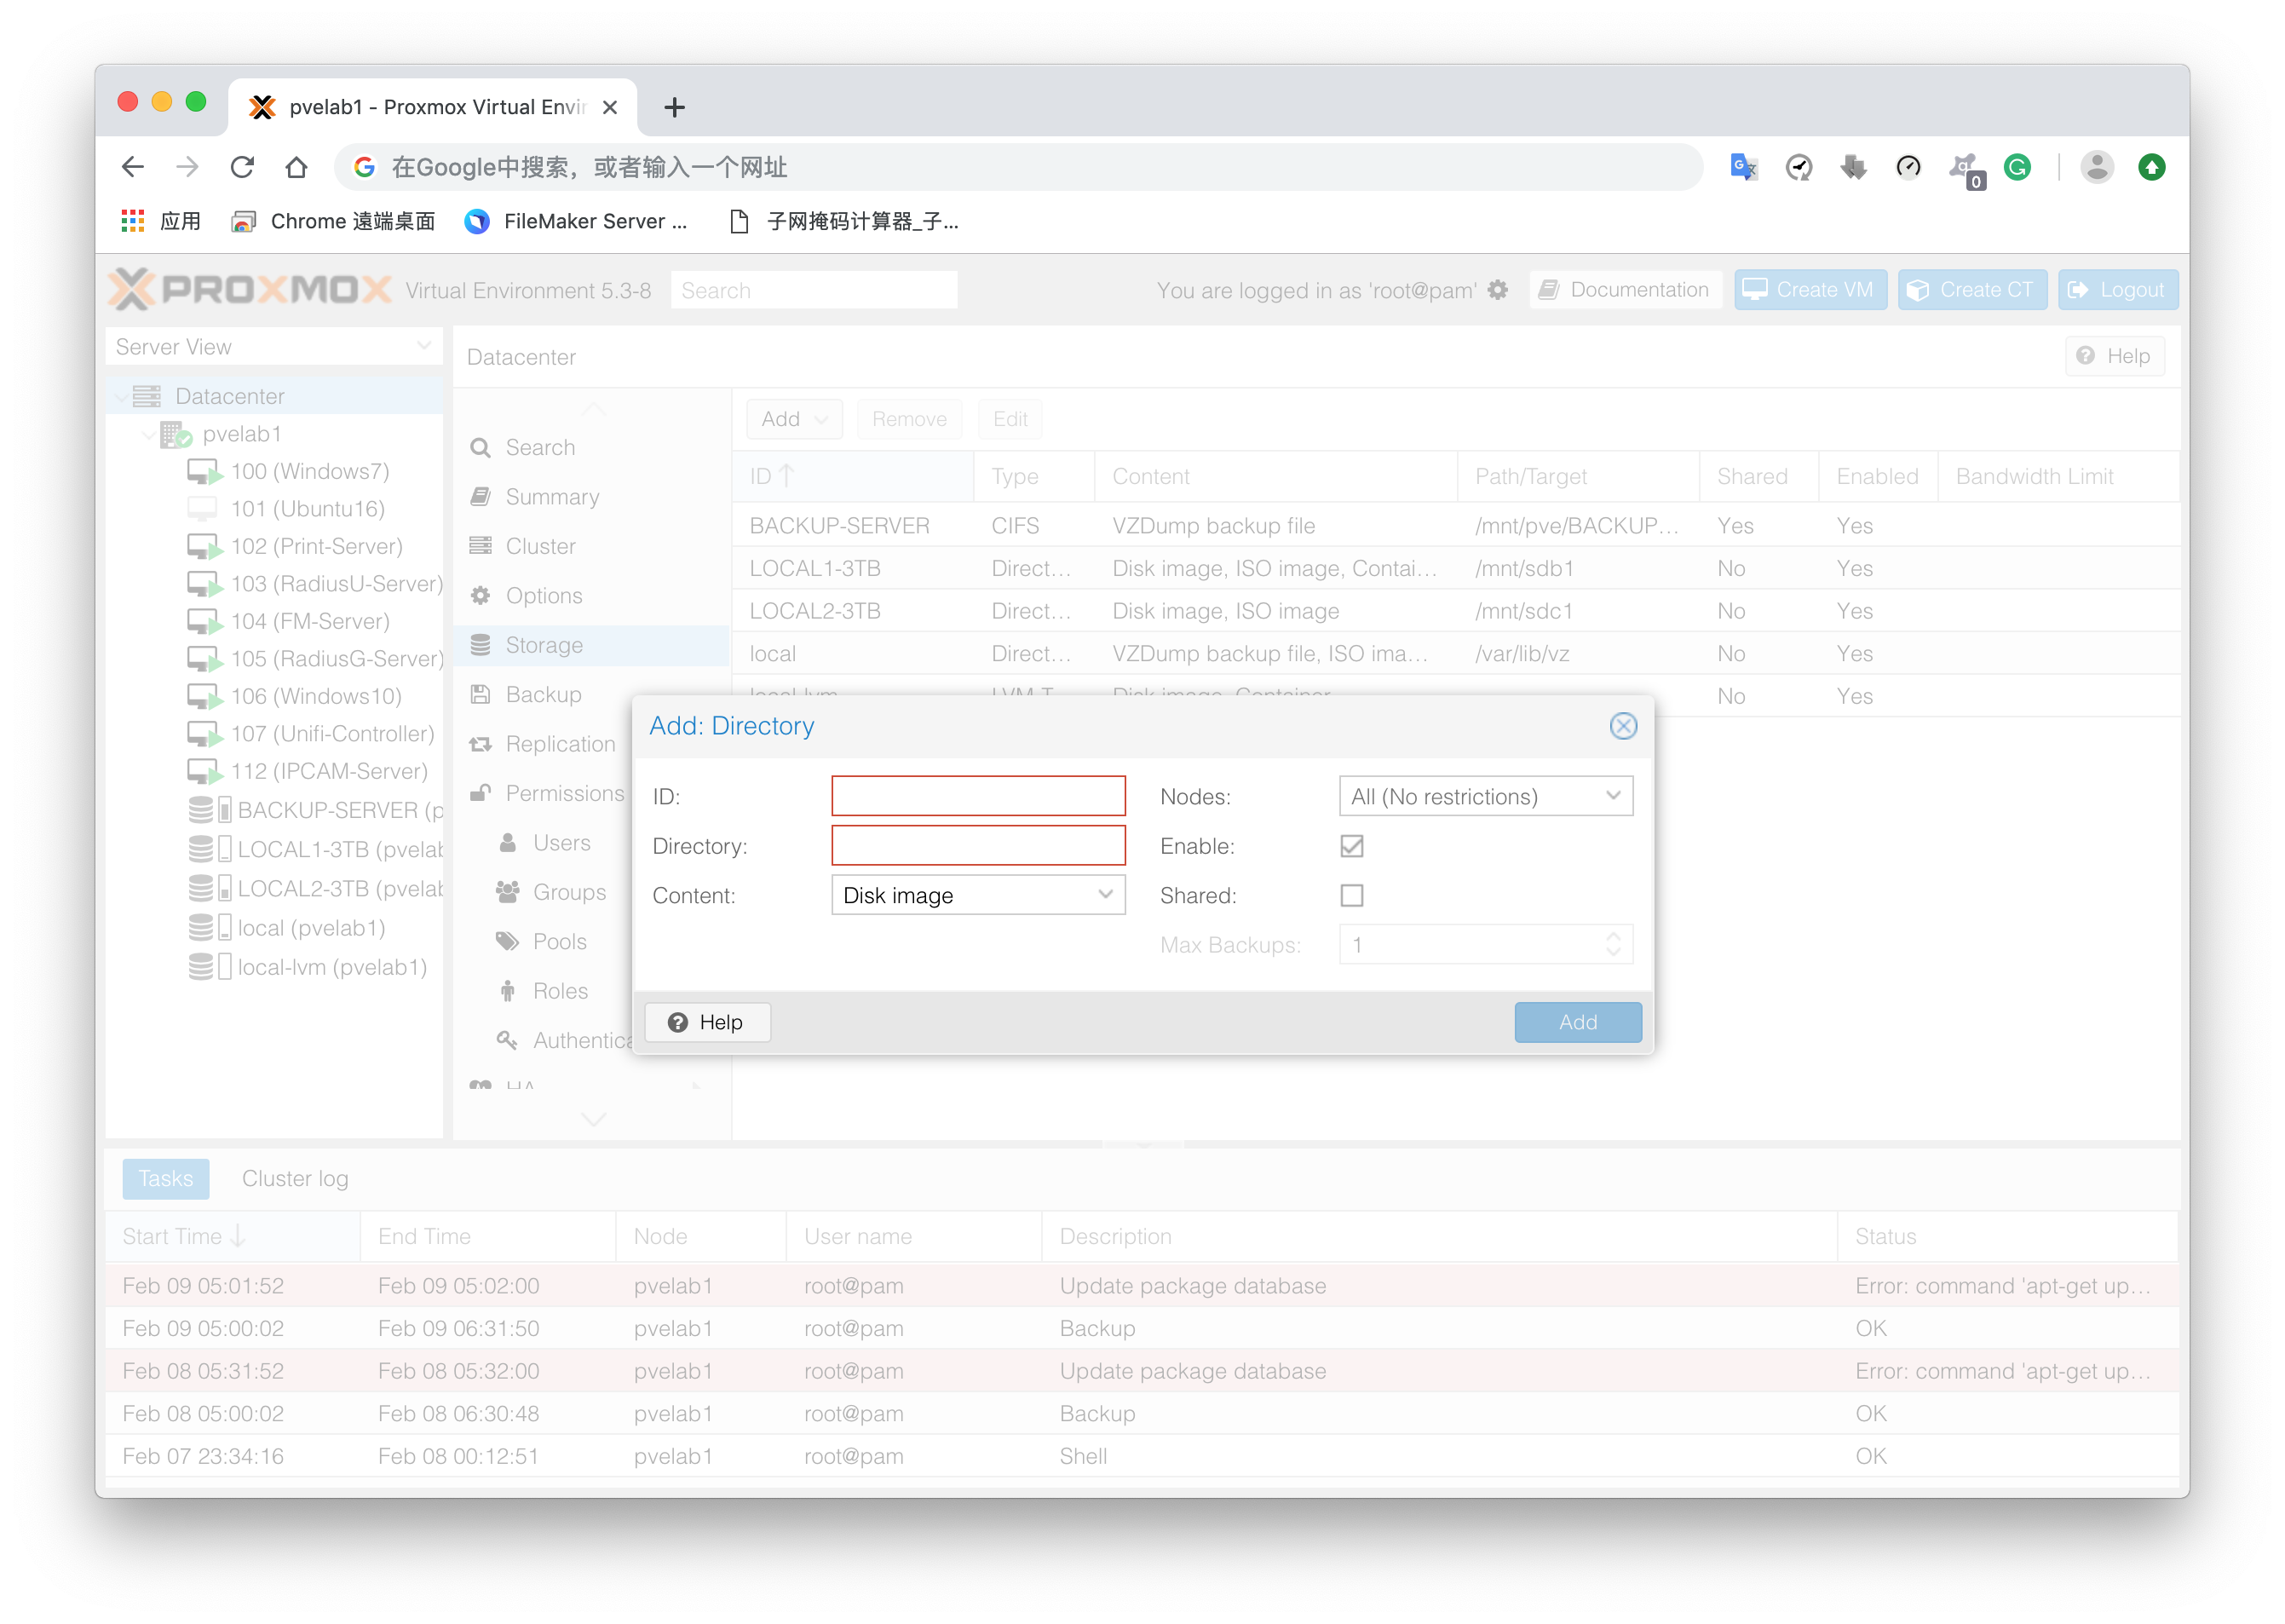
Done!
新的硬碟空間就會出現在左側儲存空間區囉!You are able to see a new hard drive in the left side storage tab.
REF: http://blog.pulipuli.info/2014/10/proxmox-ve-add-another-hard-disk-in.html