
Before this setup
To start the setup. You should follow this article to setup an internet interface (bridge/tunnel mode) first.
https://peterliu.top/index.php/archives/1168
Overview
After a rough time with TP-Link enterprise access point and controller. I decided to change all of the access points in my home to Fortinet system. Choosing a Fortinet system are able to control access point in Fortigate firewall also the hardware process is much stronger to handle devices.
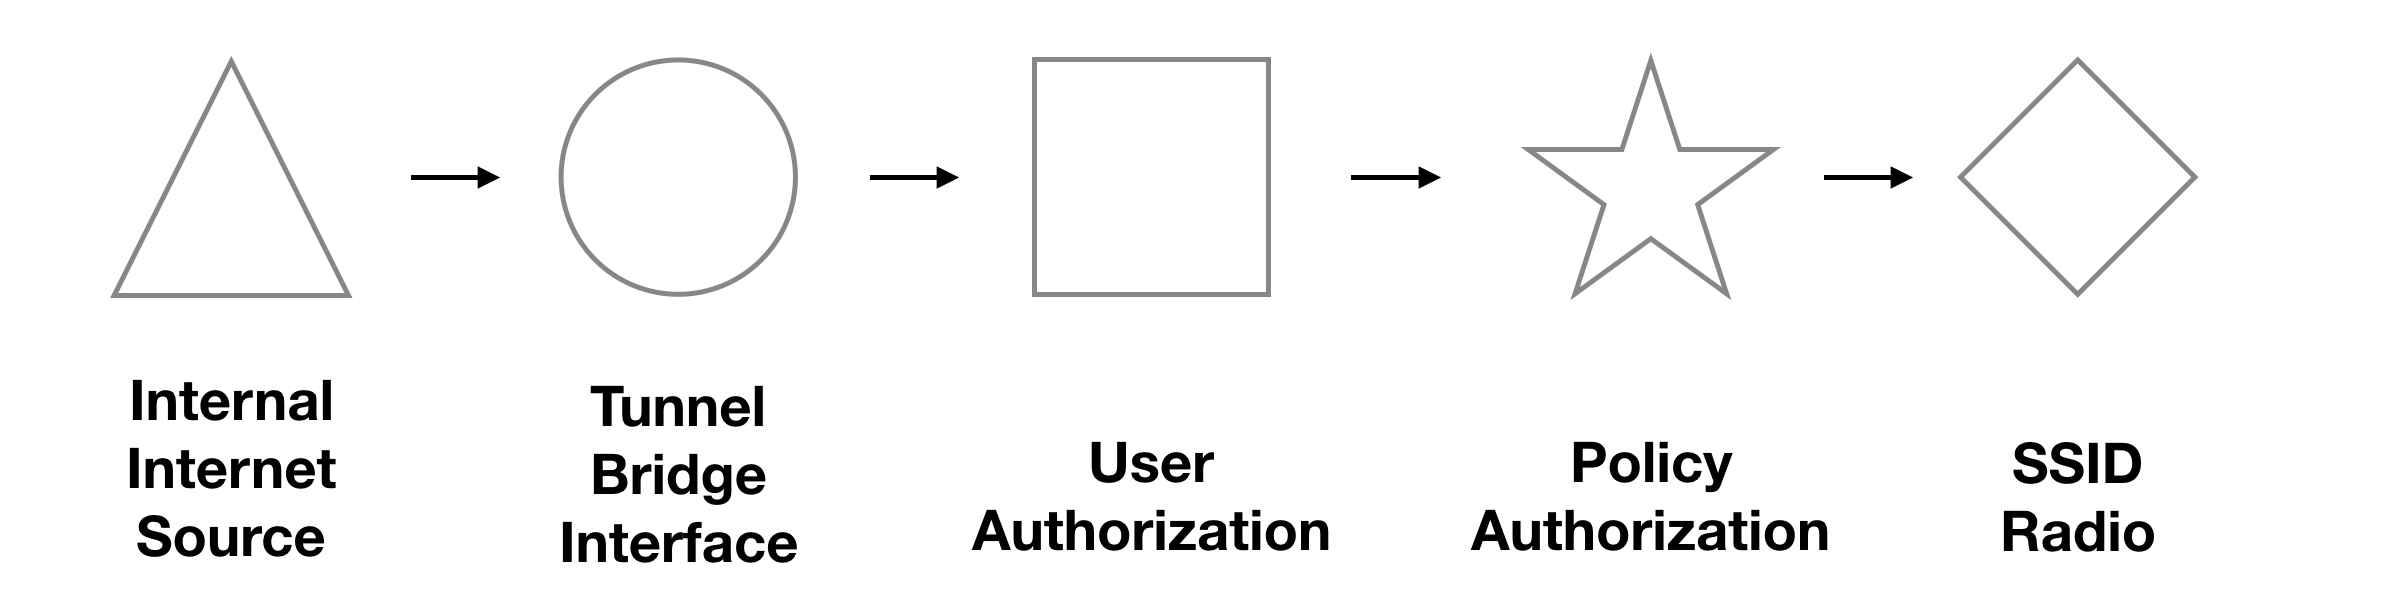
Setup a captive portal Wifi for FortiAP
Using a captive portal provided a website auth and auto session kill when the user is not using. Different than WPA2 personal or enterprise, those password and account information to login to the WiFi system will not store in local device storage.
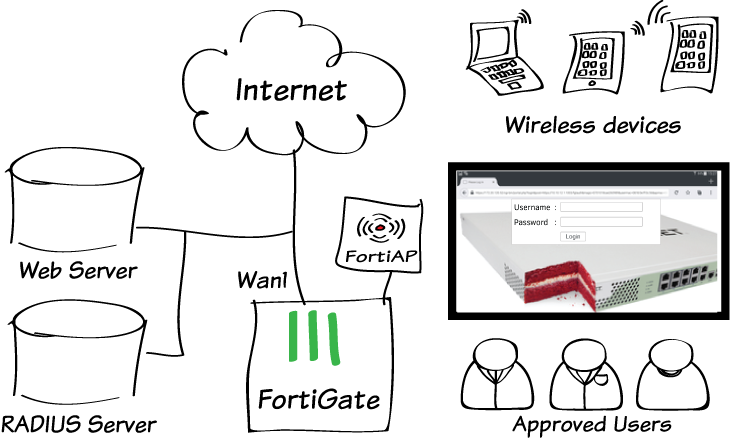
Picture & Information ref: http://cookbook.fortinet.com/using-an-external-captive-portal-for-wifi-security/
The website page is a script that gathers the user logon information and send back to FortiGate with format messsage
https://<FGT_IP>:1003/fgtauth with data magic=session_id&username=<username>&password=<password>
Example: https://cookbook.fortinet.com/wp-content/uploads/FortiGate/wifi-ext-captive-portal/portal-php.txt
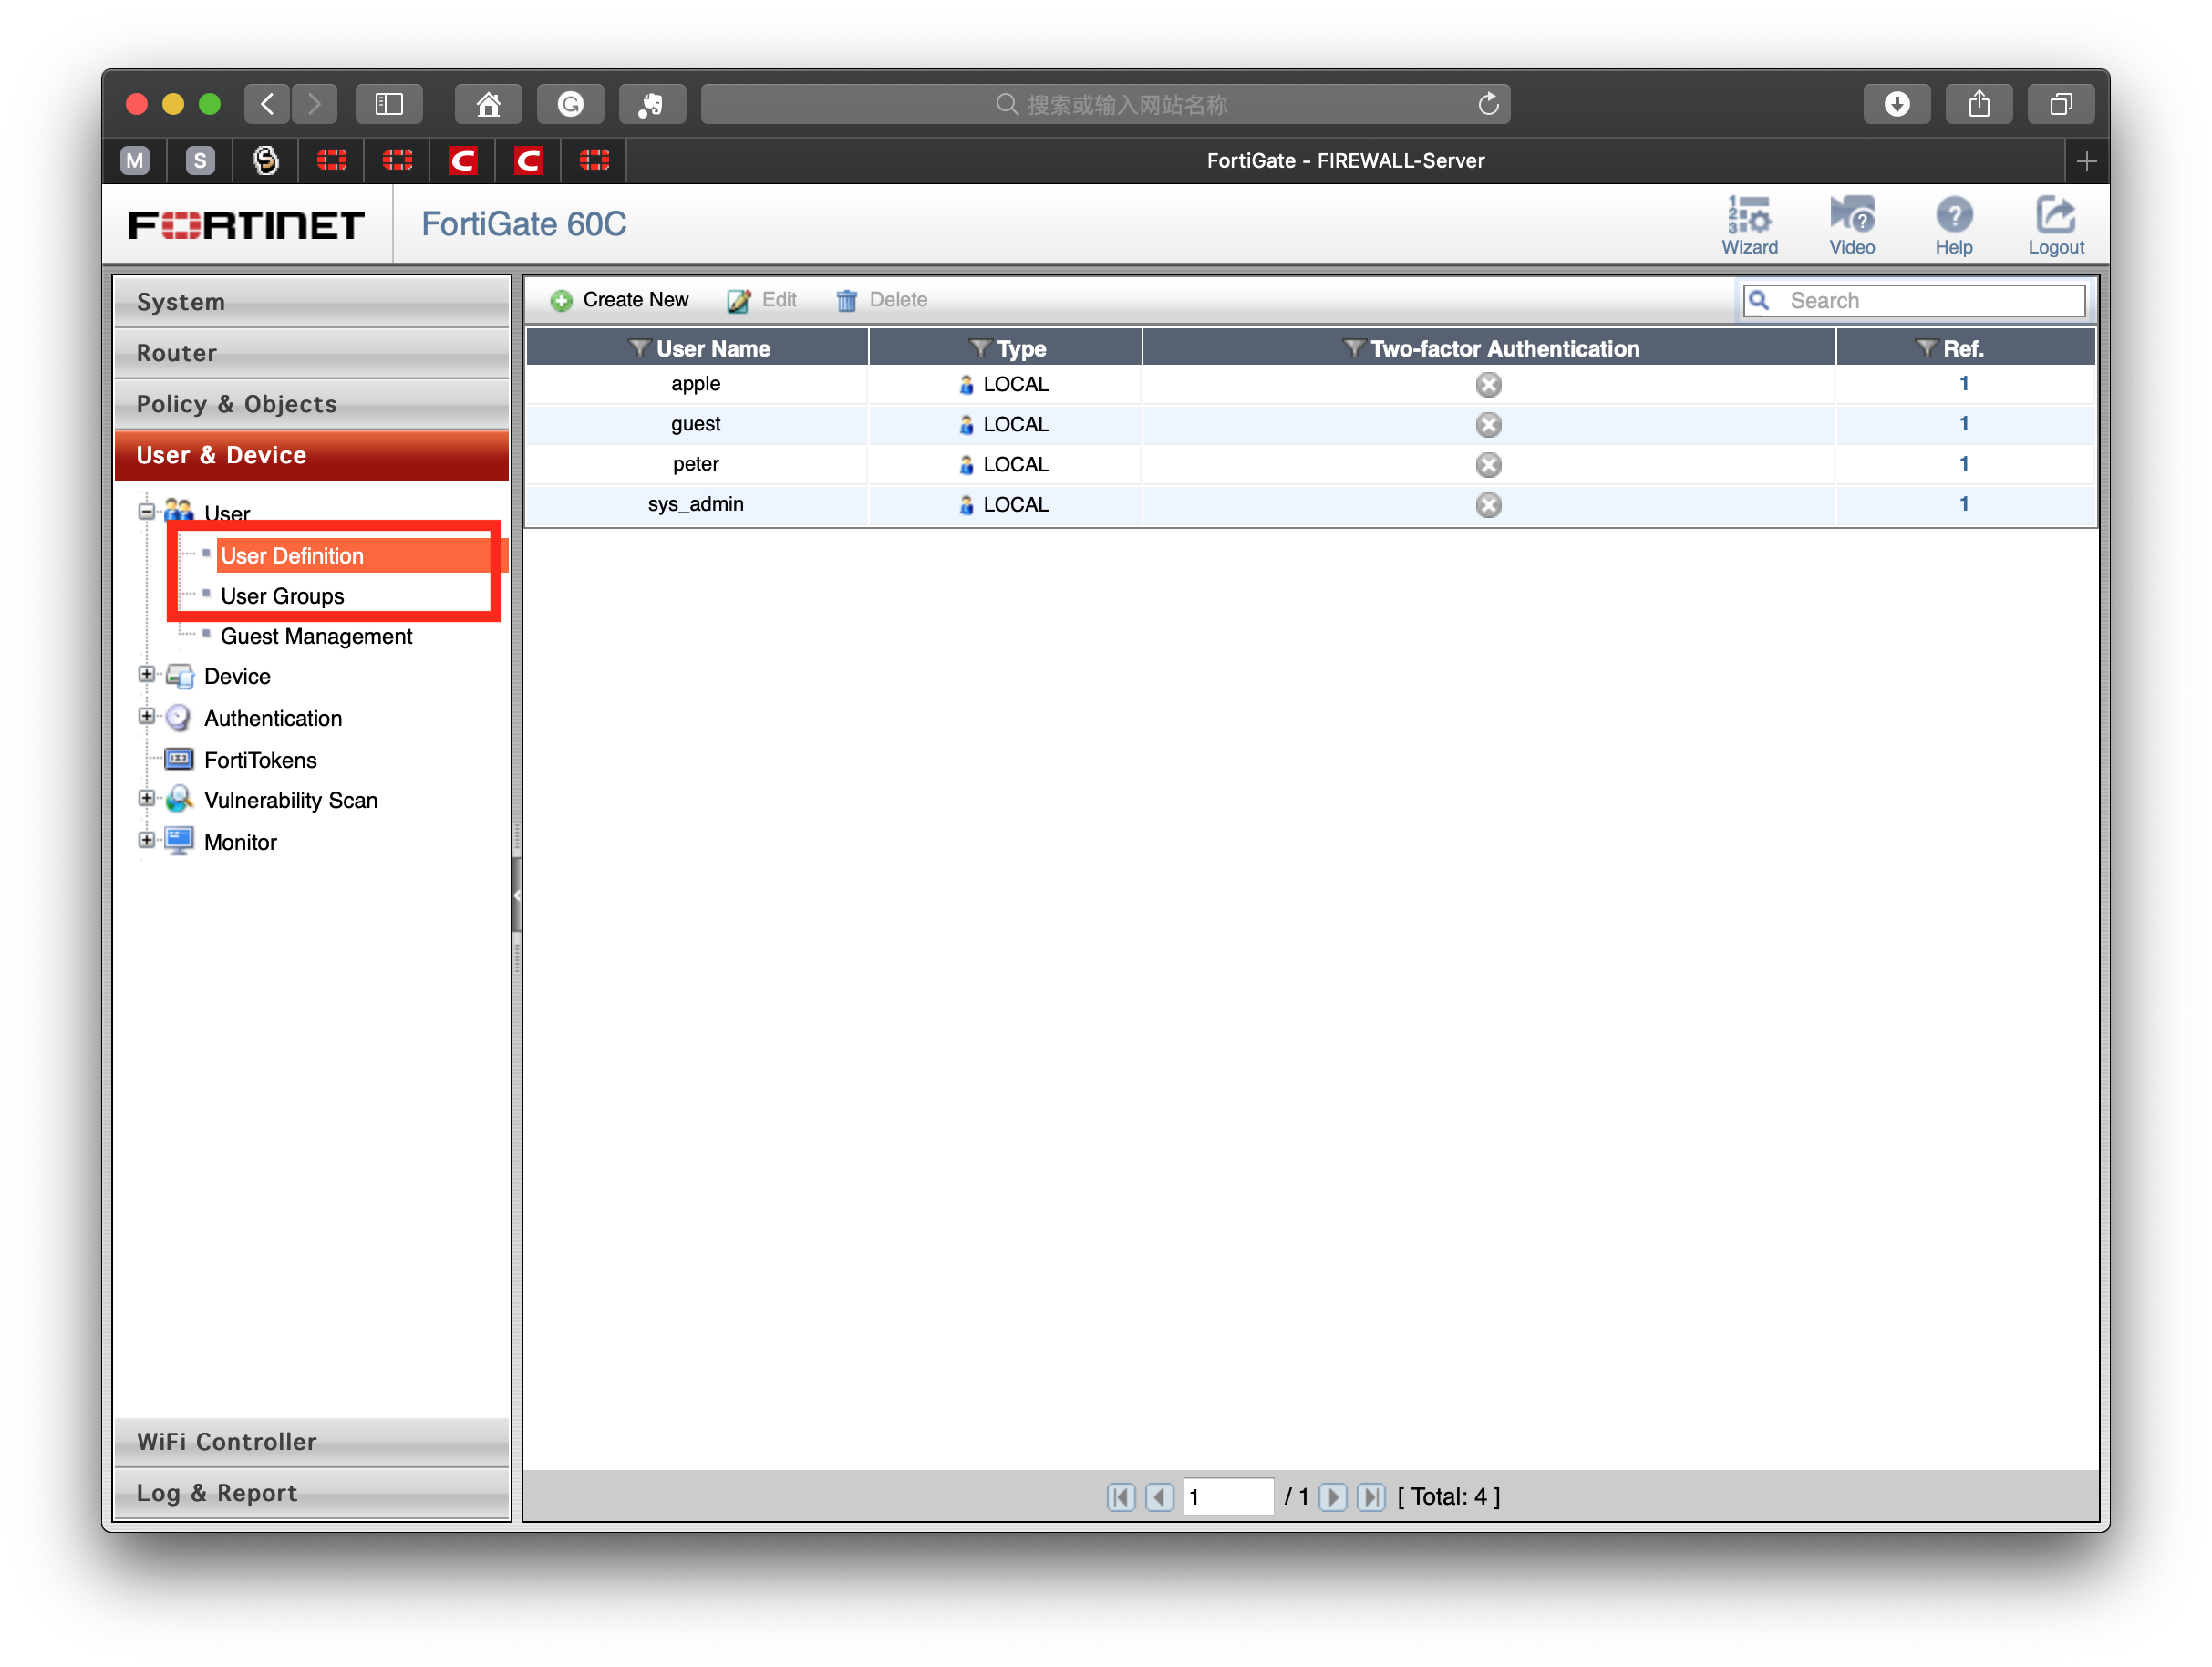
Add a local user and local group
User&Device> User Definition > Create New > Local > Username/Password
User&Device> User Group > Create New > Firewall > Add User
Enforce HTTPS authentication.
Enable use of HTTPS for authentication so that user credentials are communicated securely. (If you are not using external portal you can skip this section)
-
config user settingset auth-secure-http enableend
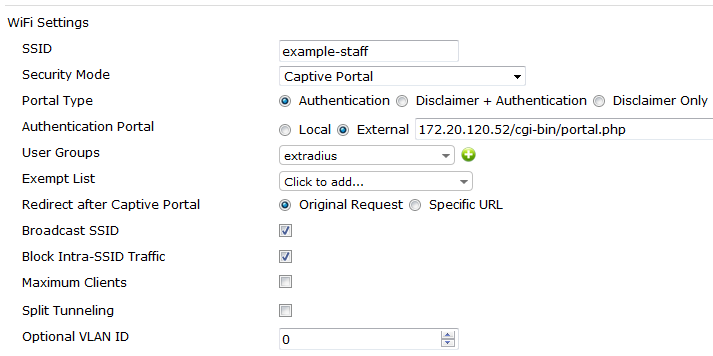
Create the WiFi network
WiFi Controller > WiFi Network > SSID
When you are using the captive portal, it is only available to use tunnel traffic mode.
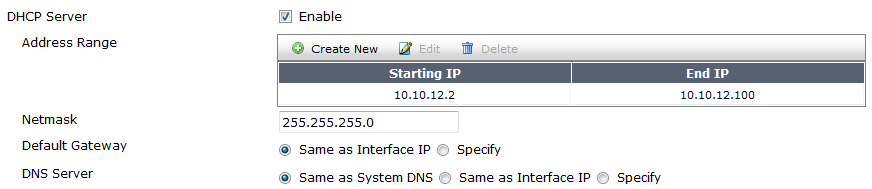
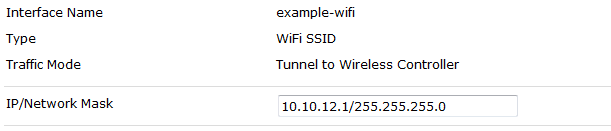 Enable DHCP for clients.
Configure external captive portal security.
Do not include “http://” or “https://” in the captive portal URL.
If you don’t have your own captive server to authentication. You can choose the internal authentication that built-in in FortiGate. (Choose this option in Authentication Portal)
<policy_id> from ID column of the policy list (Policy & Objects > Policy > IPv4).
In the CLI, enable bypass of the captive portal so that the user can make the initial contact with the external server.
config firewall policy
  edit <policy_id>
    set captive-portal-exempt enable
  end
Create the Internet access security policy
Go to Policy & Objects > Policy > IPv4.
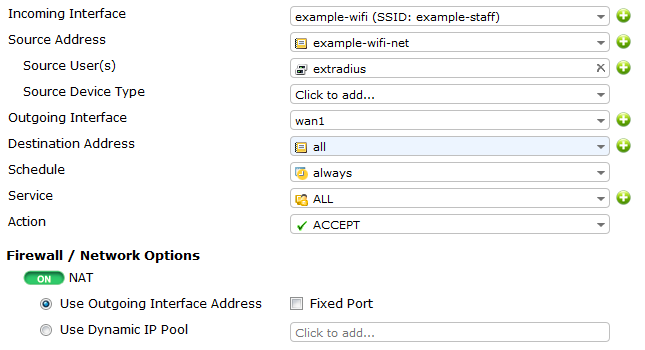
Set up an incoming WiFi traffic to assess outgoing internet to access internet.
Connect and authorize the FortiAP
Read this article: https://peterliu.top/?p=1168&preview=true

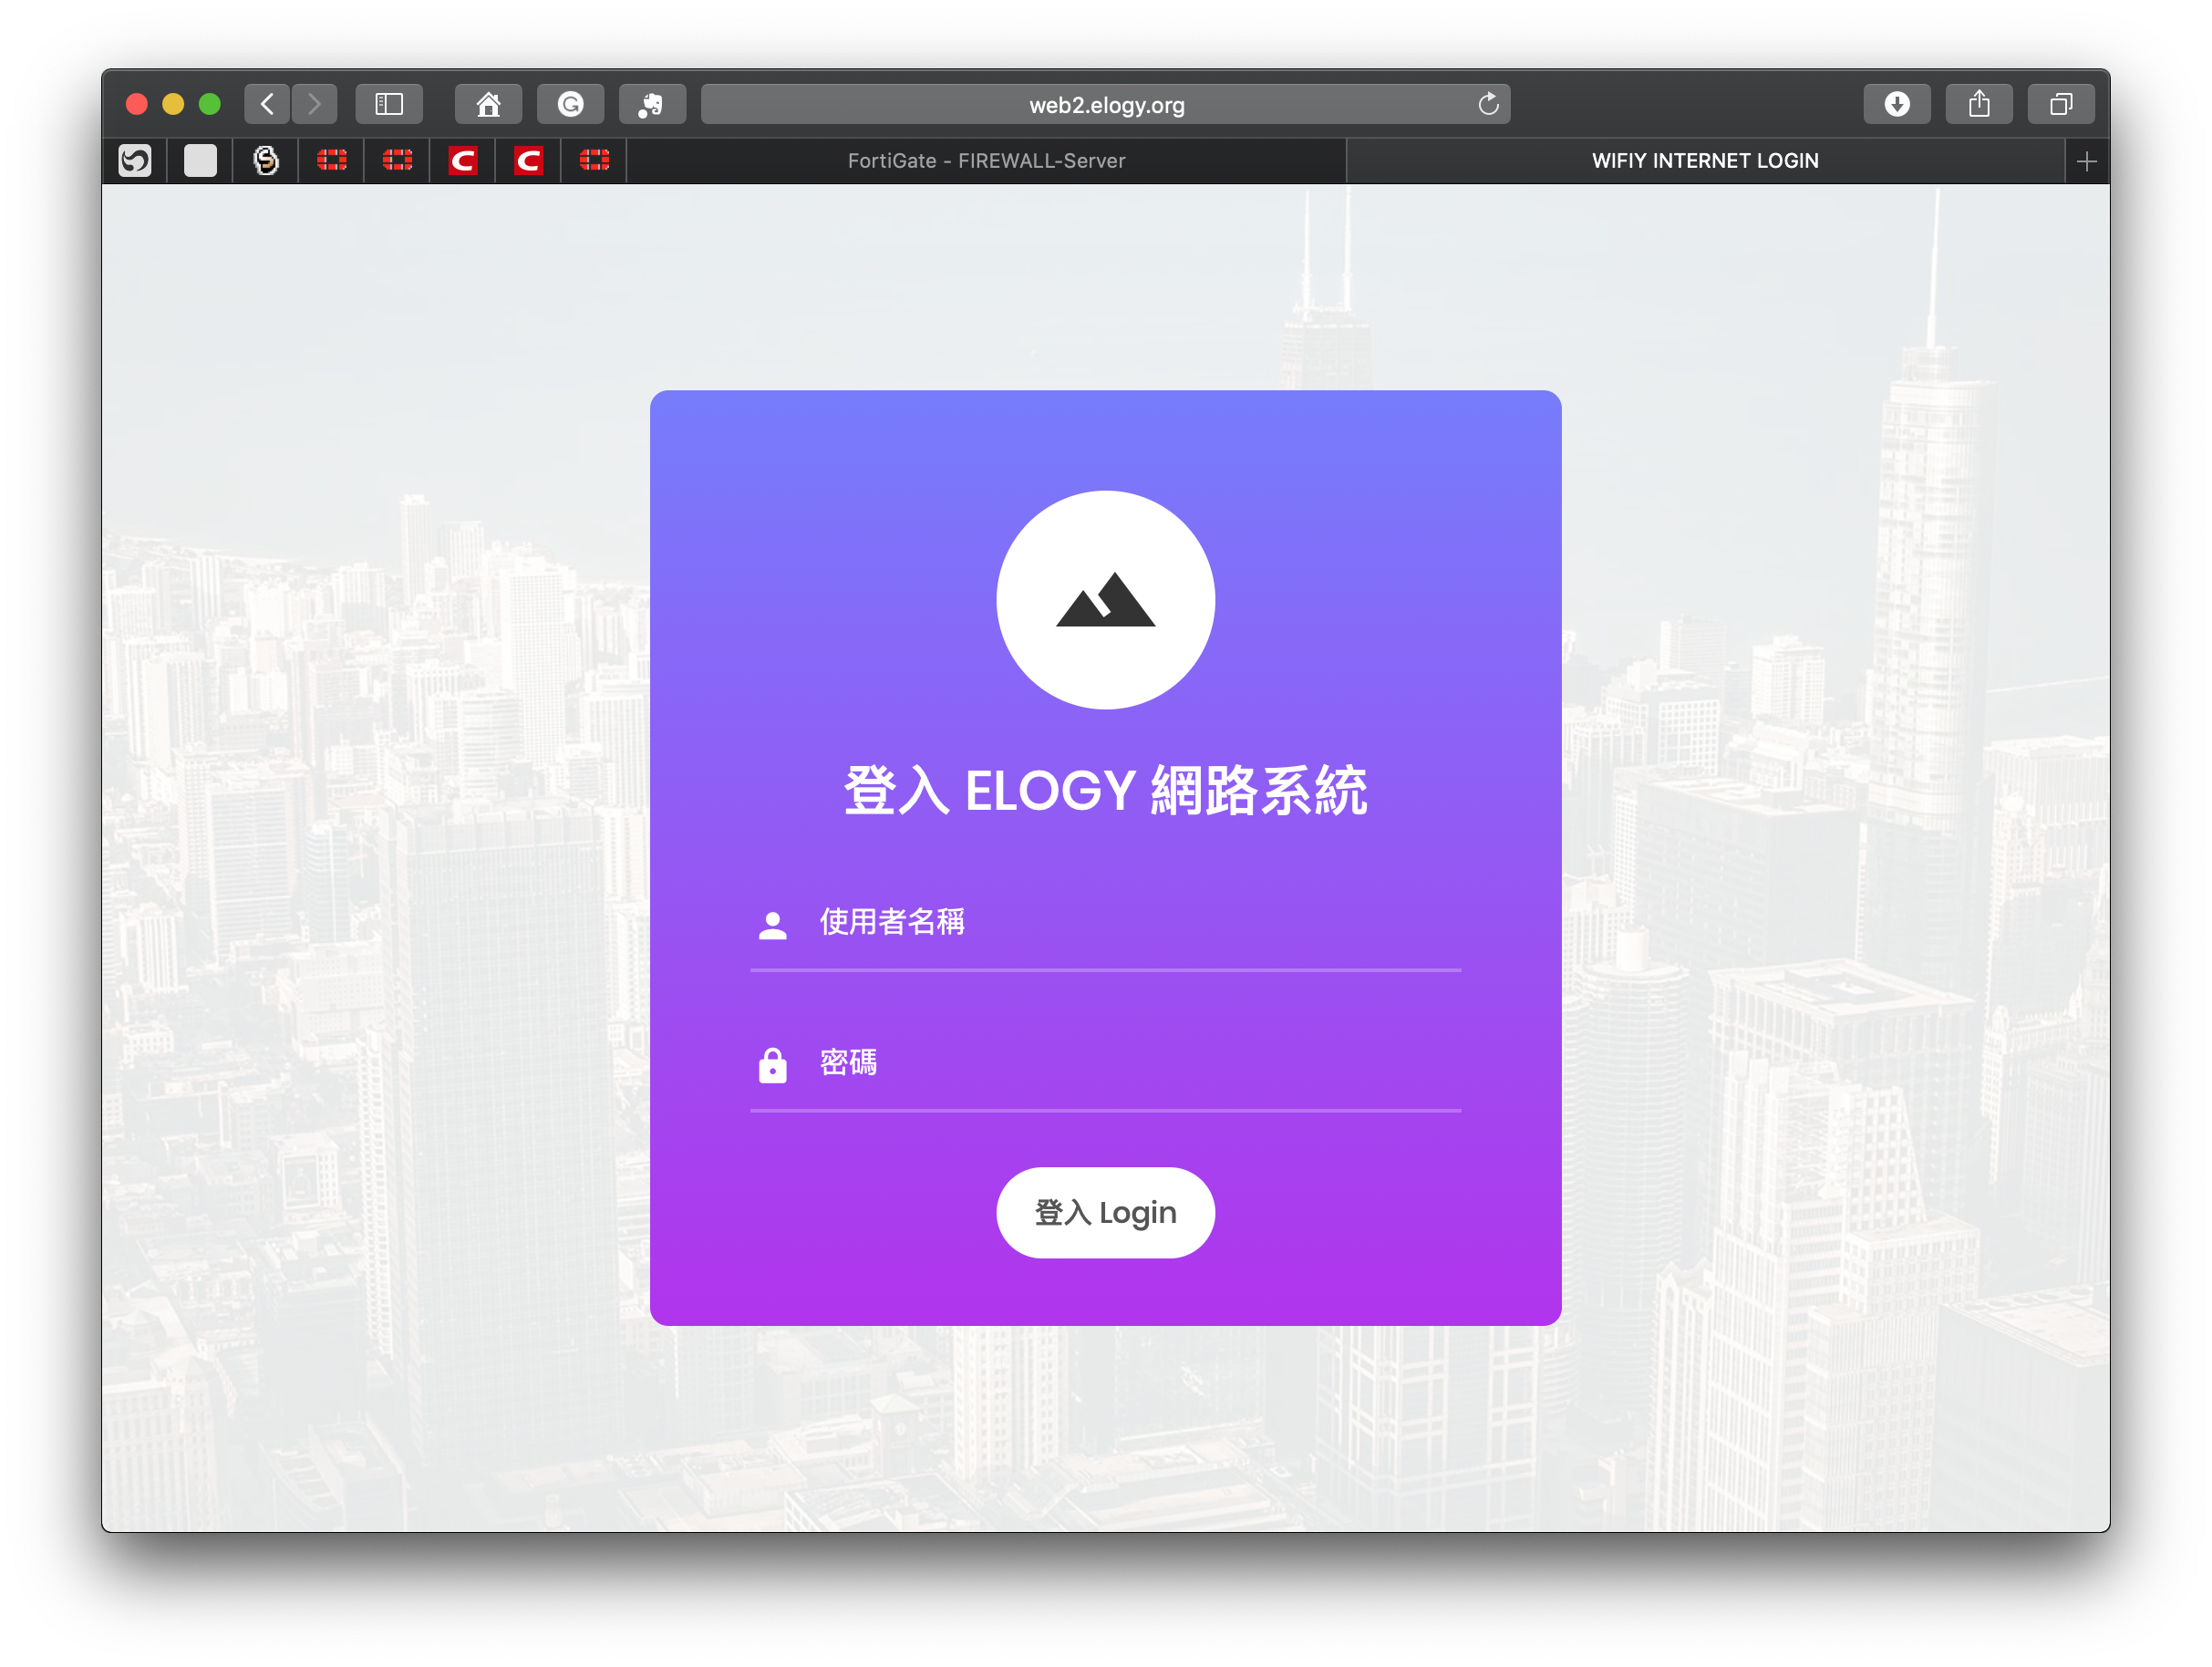
Result
(The web server certificate must be verifiable, or the browser will show warnings.)
TIPS:
If you want to set a timeout for session user. Please follow these steps.
Set Auth timeout integer:
config user setting
set auth-timeout <timeout_integer>  This range is 1 to 1440mins (24 hours).
end
Set Auth timeout type:
config user setting
set auth-timeout-type <timeout type>

<timeout type>:
idle-timeout  :User will be remove if there is no traffic received.
hard-timeout  :User will be removed after the configured auth-timeout value
new-session   :User will be prompted to authenticate for new sessions after the configured auth-timeout value
1 則留言