
Proxmox Virtual Environment (Proxmox VE; short PVE) is an open-source server virtualization environment. It is a Debian-based Linux distribution with a modified Ubuntu LTS kernel and allows deployment and management of virtual machines and containers. More About Proxmox: https://www.proxmox.com/en/
![]() Warning: Xpenology only for testing, not for any other uses. If you are likely to use DSM on the business environment. Please buy a regular one on synology.com
Warning: Xpenology only for testing, not for any other uses. If you are likely to use DSM on the business environment. Please buy a regular one on synology.com
You should prepare:
– Proxmox Version 5.1 or 5.2
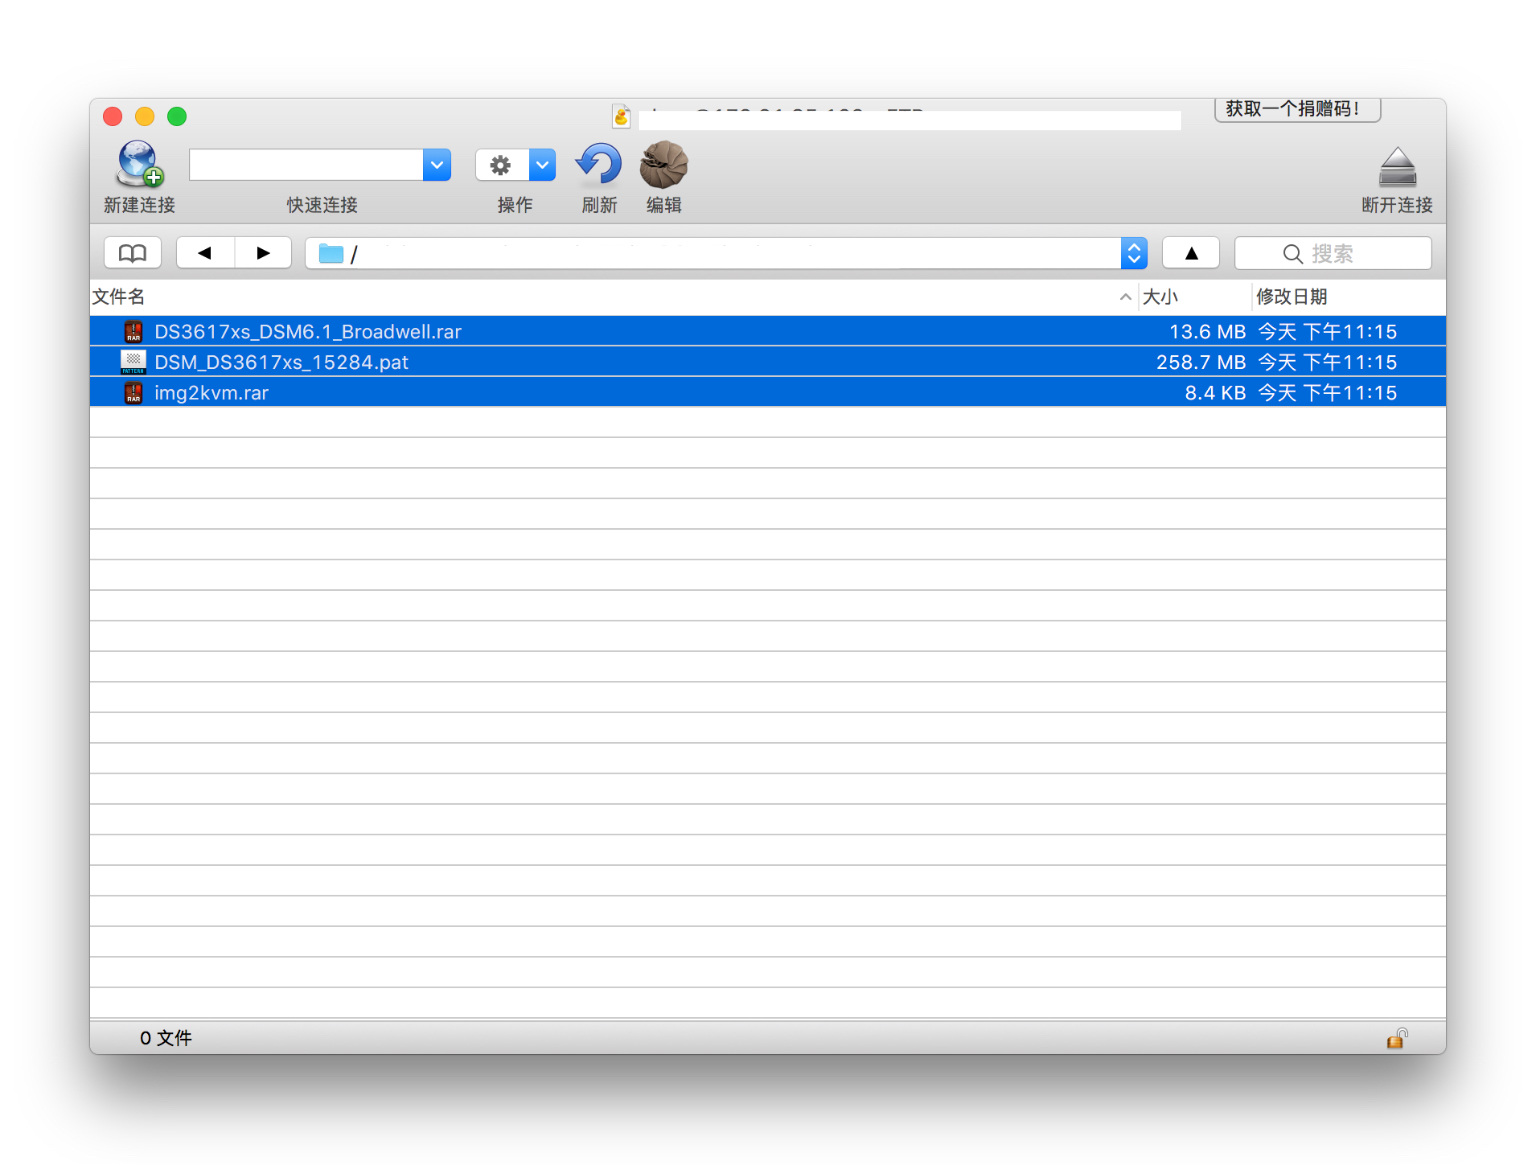
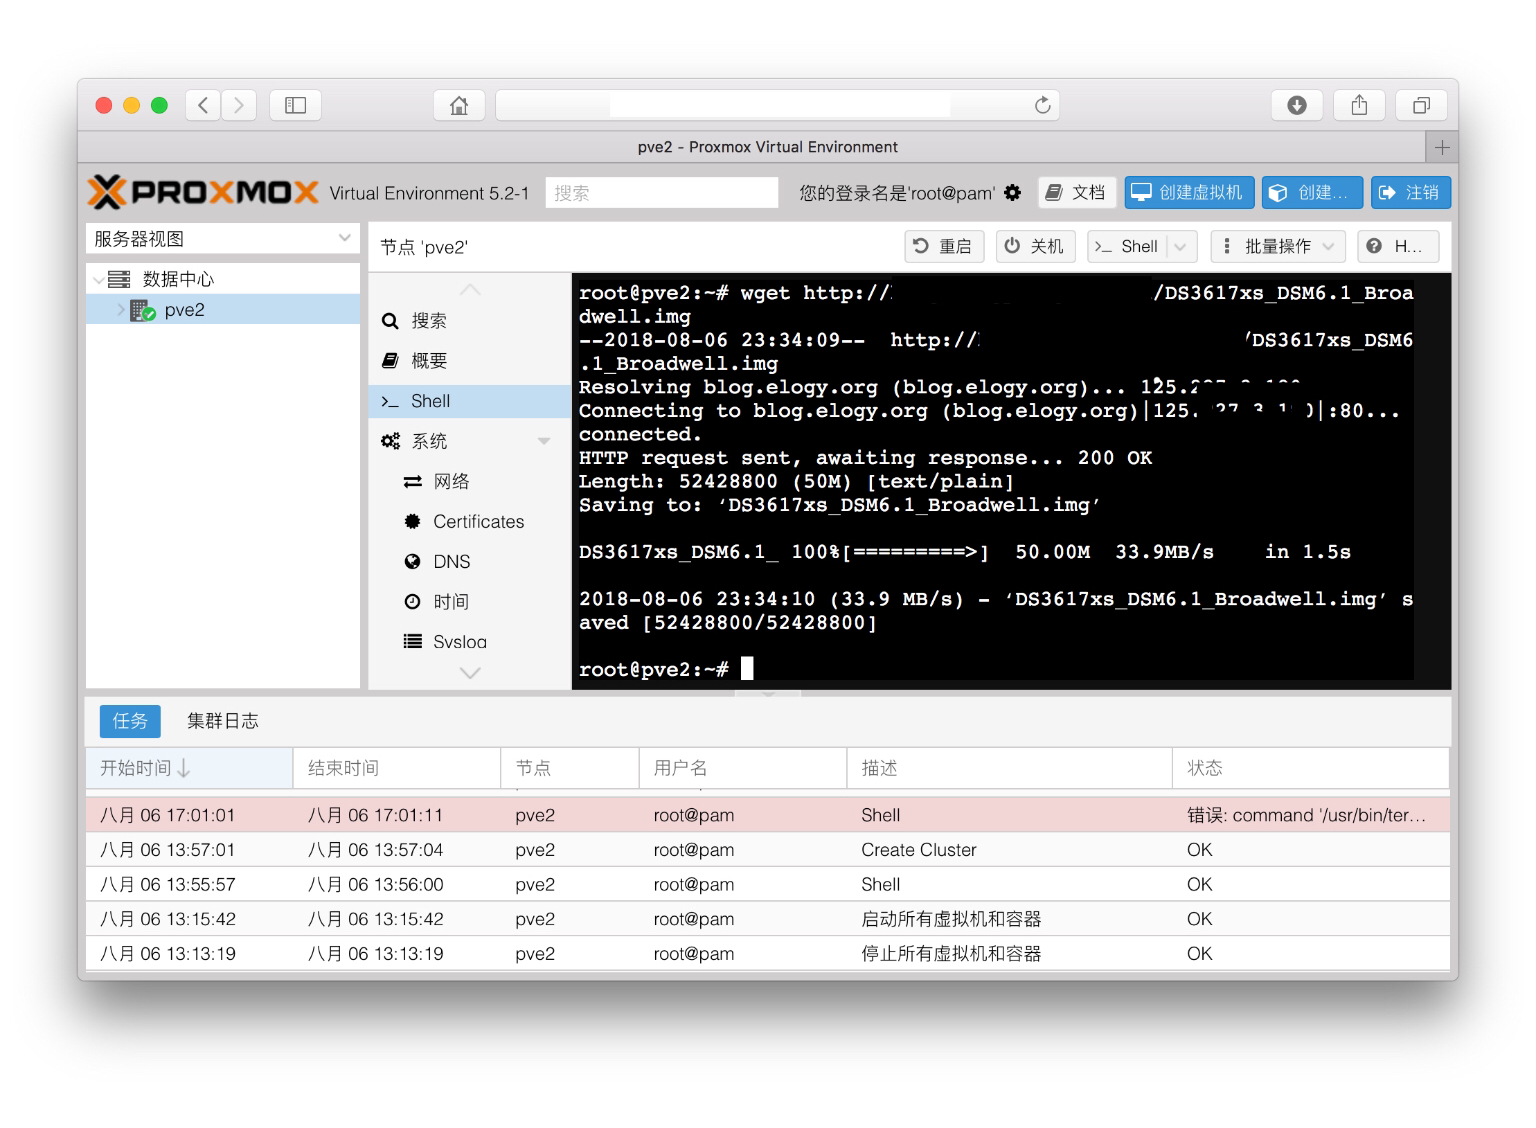
– Image of XPENOLOGY 6 (https://peterliu.top/attach/DS3617xs_DSM6.1_Broadwell.img)
– DS3617xs PAT file (https://peterliu.top/attach/DSM_DS3617xs_15284.pat)
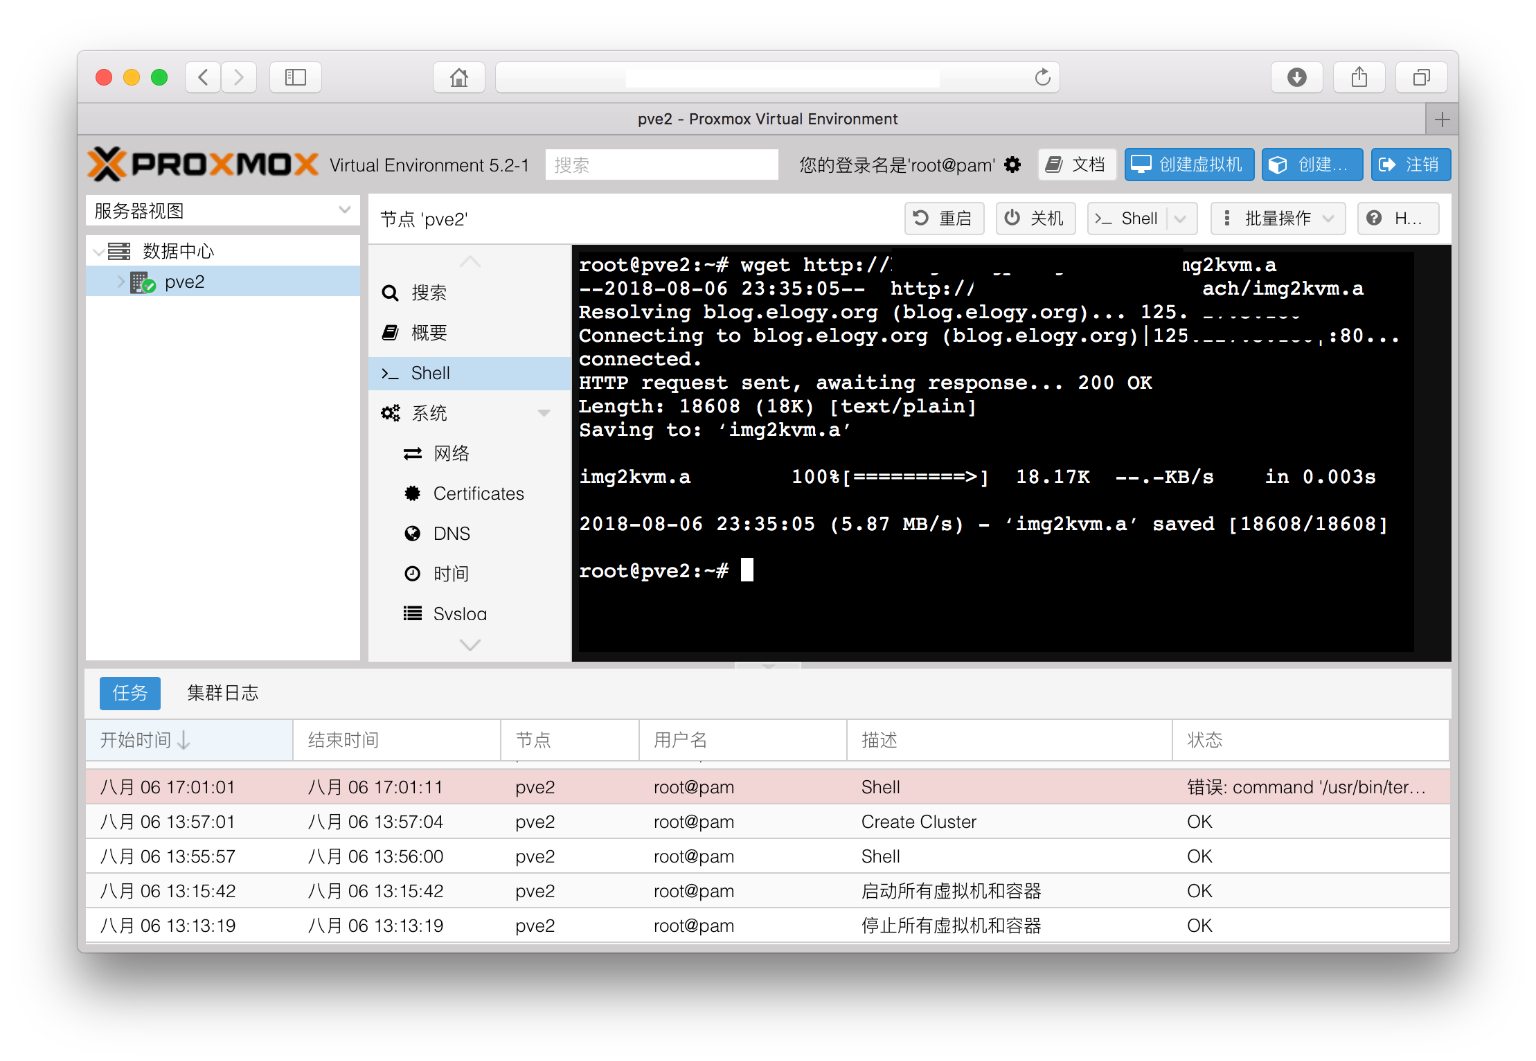
– img2kvm file (https://peterliu.top/attach/img2kvm.a)
Start to Create a New Virtual Machine
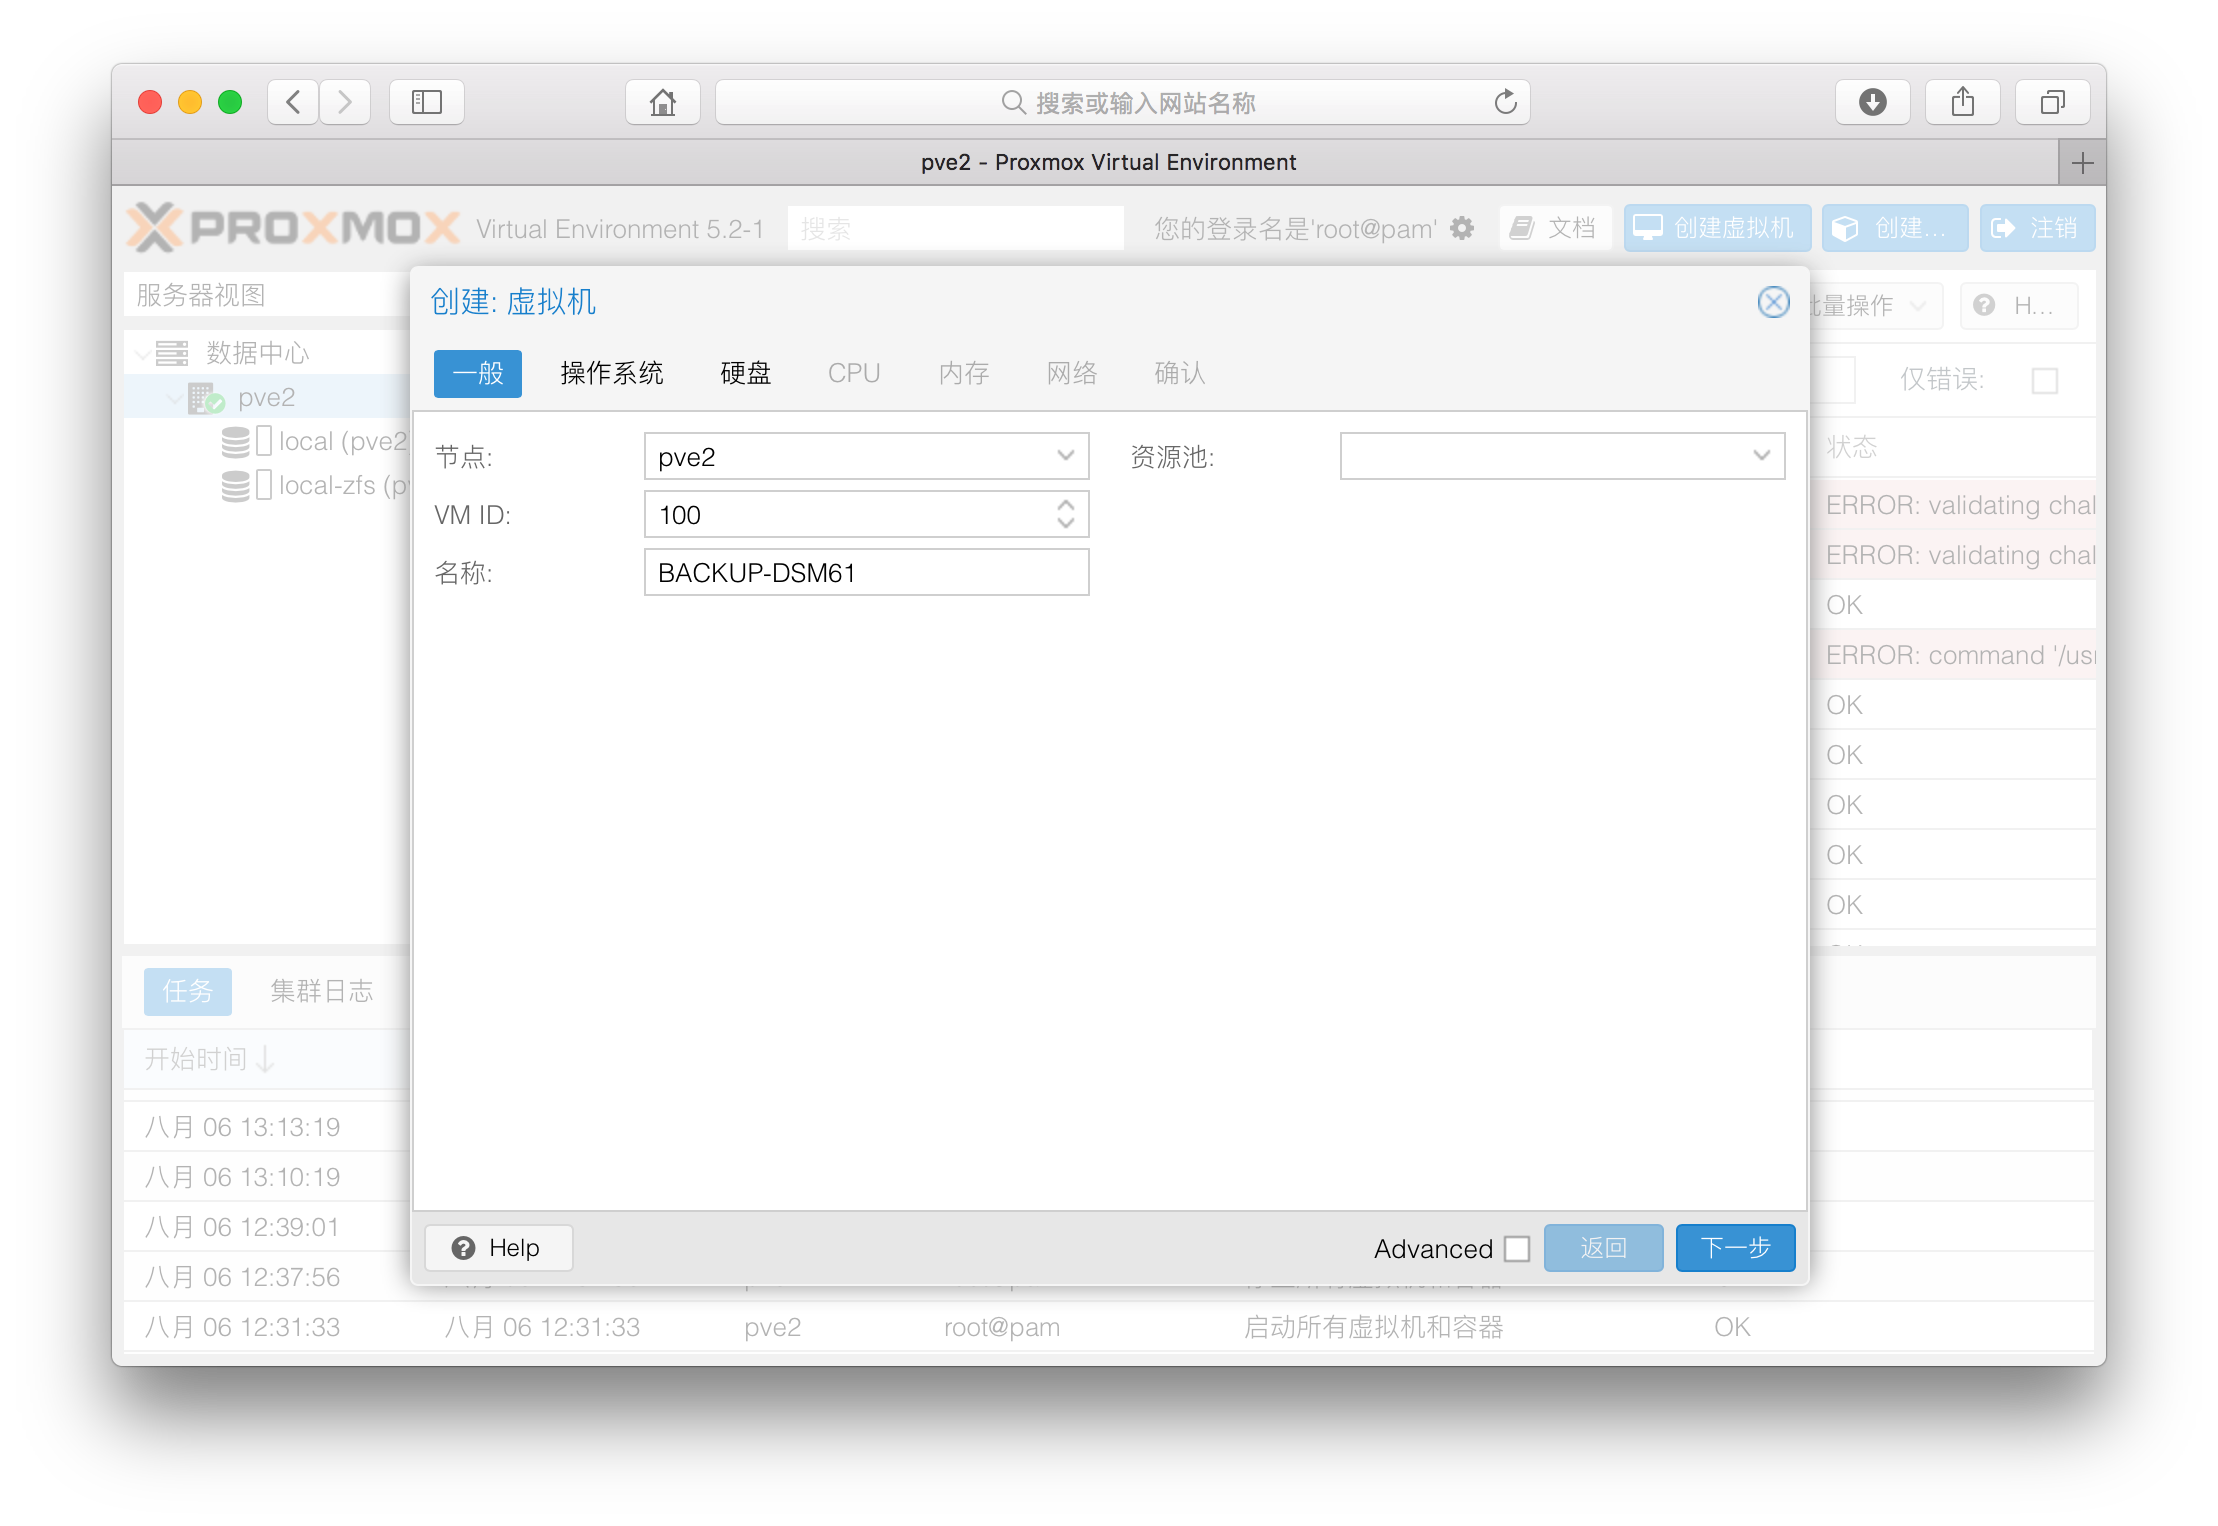
First you need to create a new Proxmox virtual machine with the following configure.
Give a random name for your virtual machine and VM ID
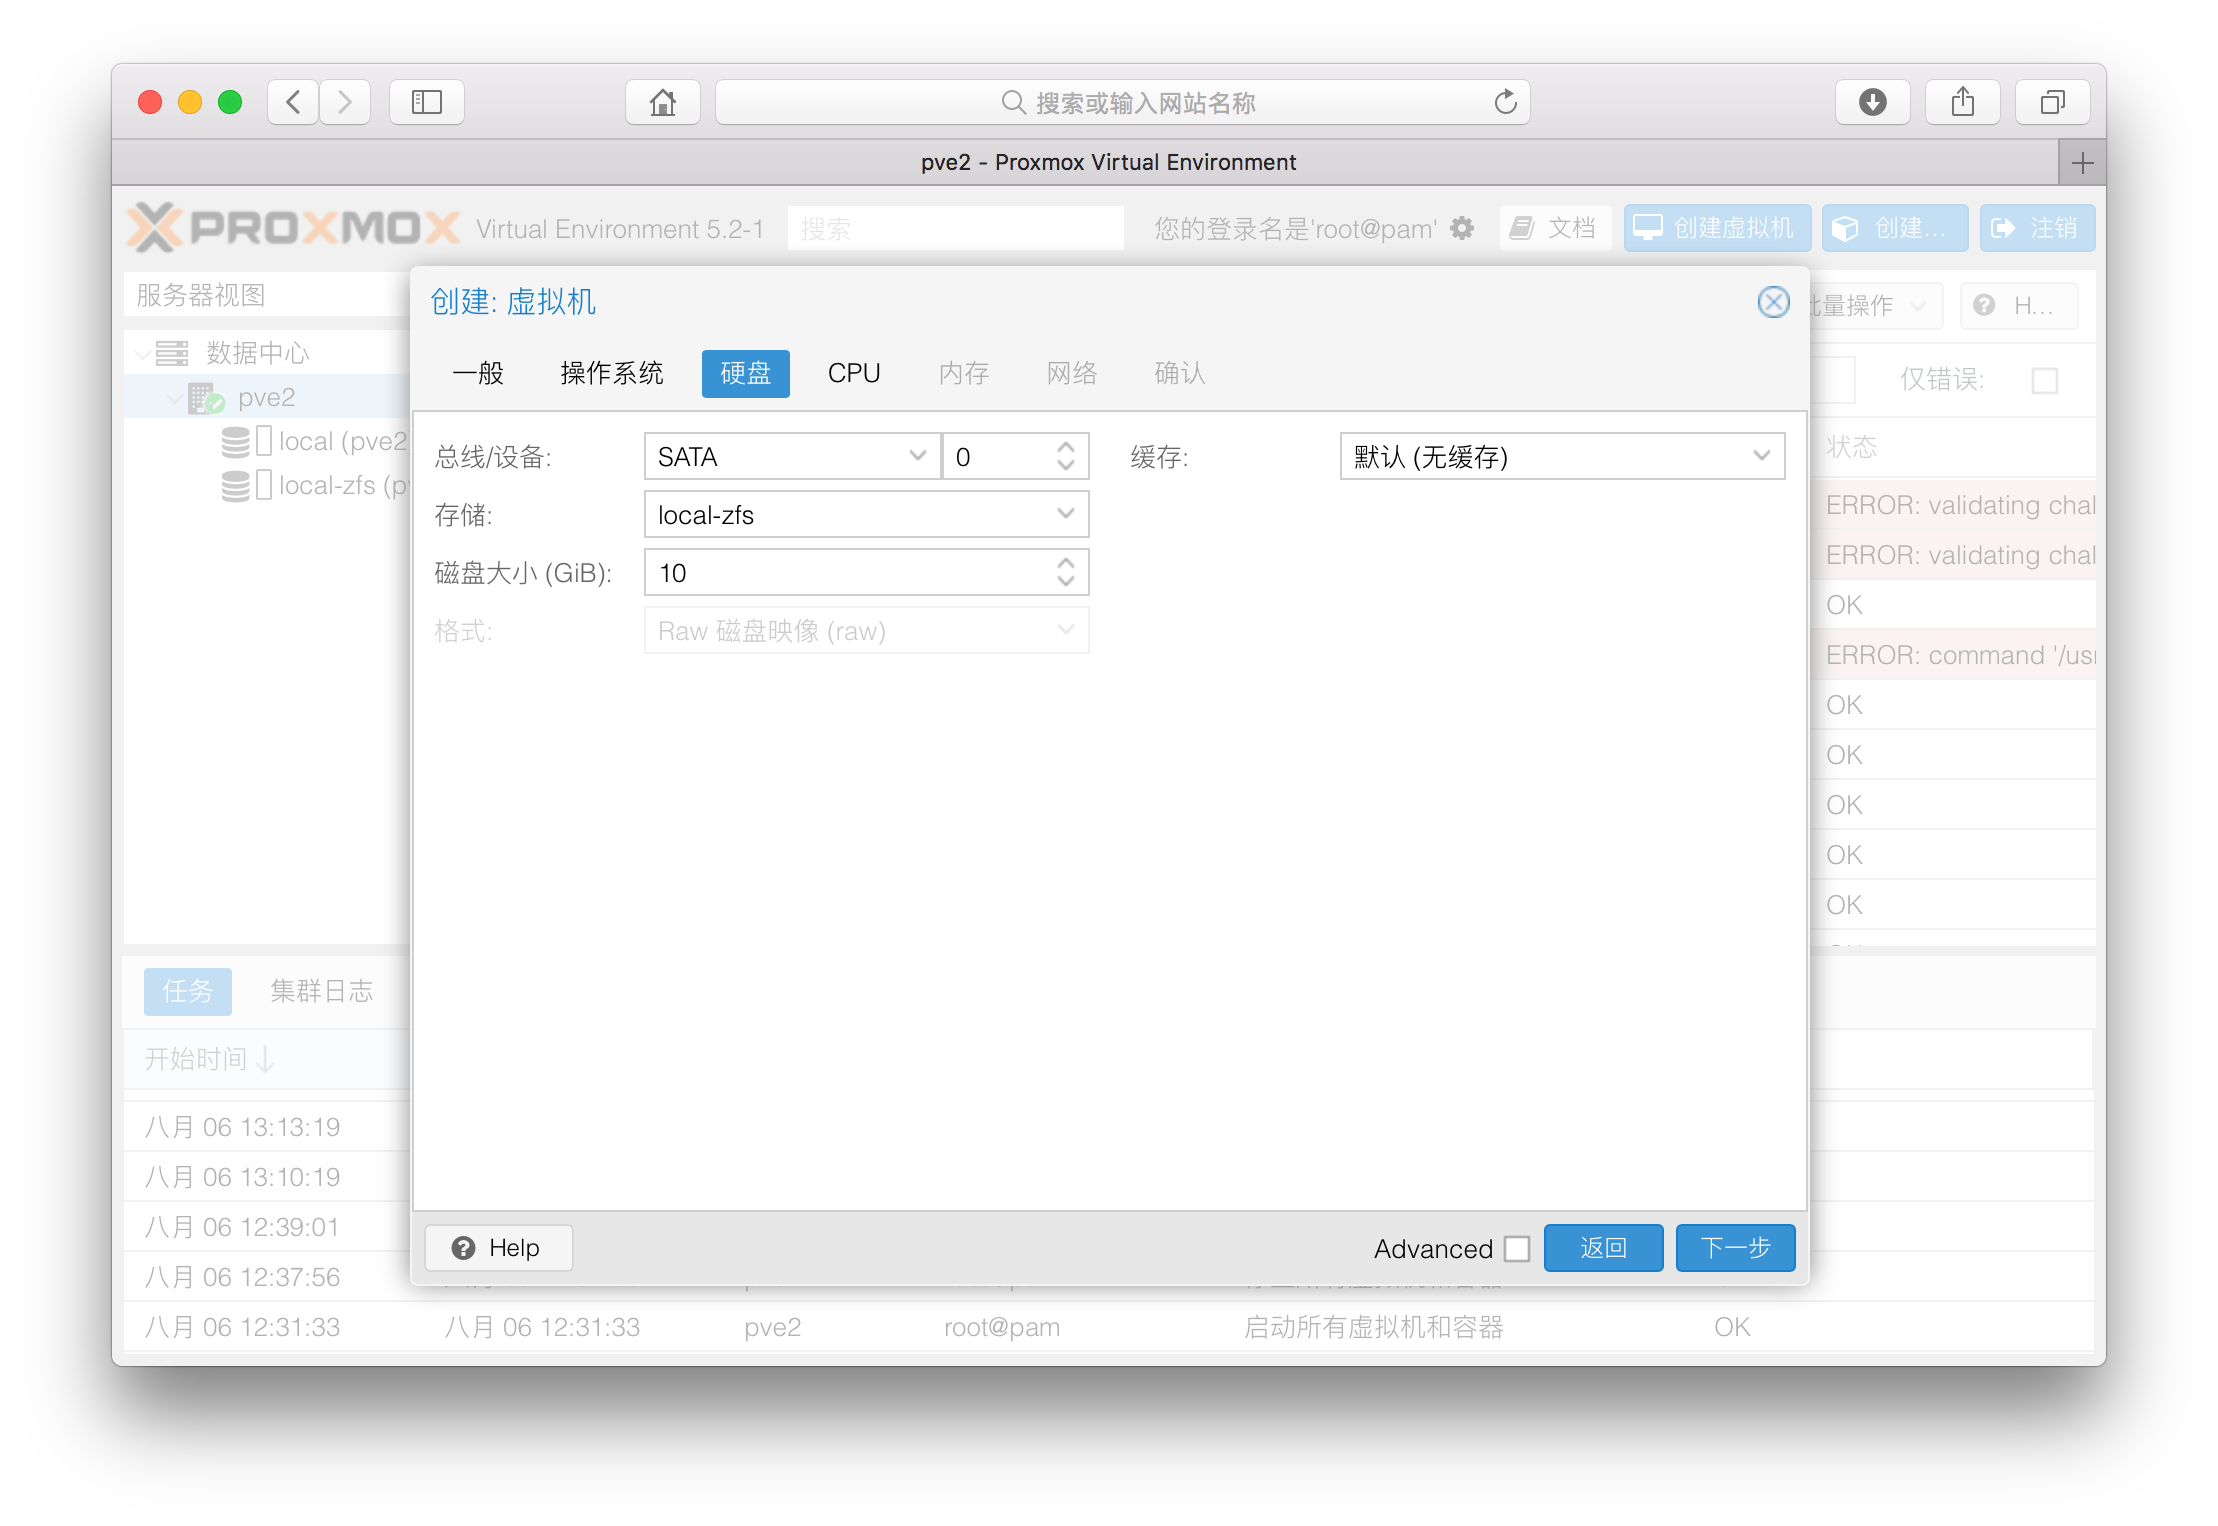
 Second, in “OS” tab, don’t use any os to boot or install any os on here. Also, choose Linux on the right side (default).
 We should create at less 5GB of SATA virtual drive for booting in third steps. I will use 10GB for the demo.
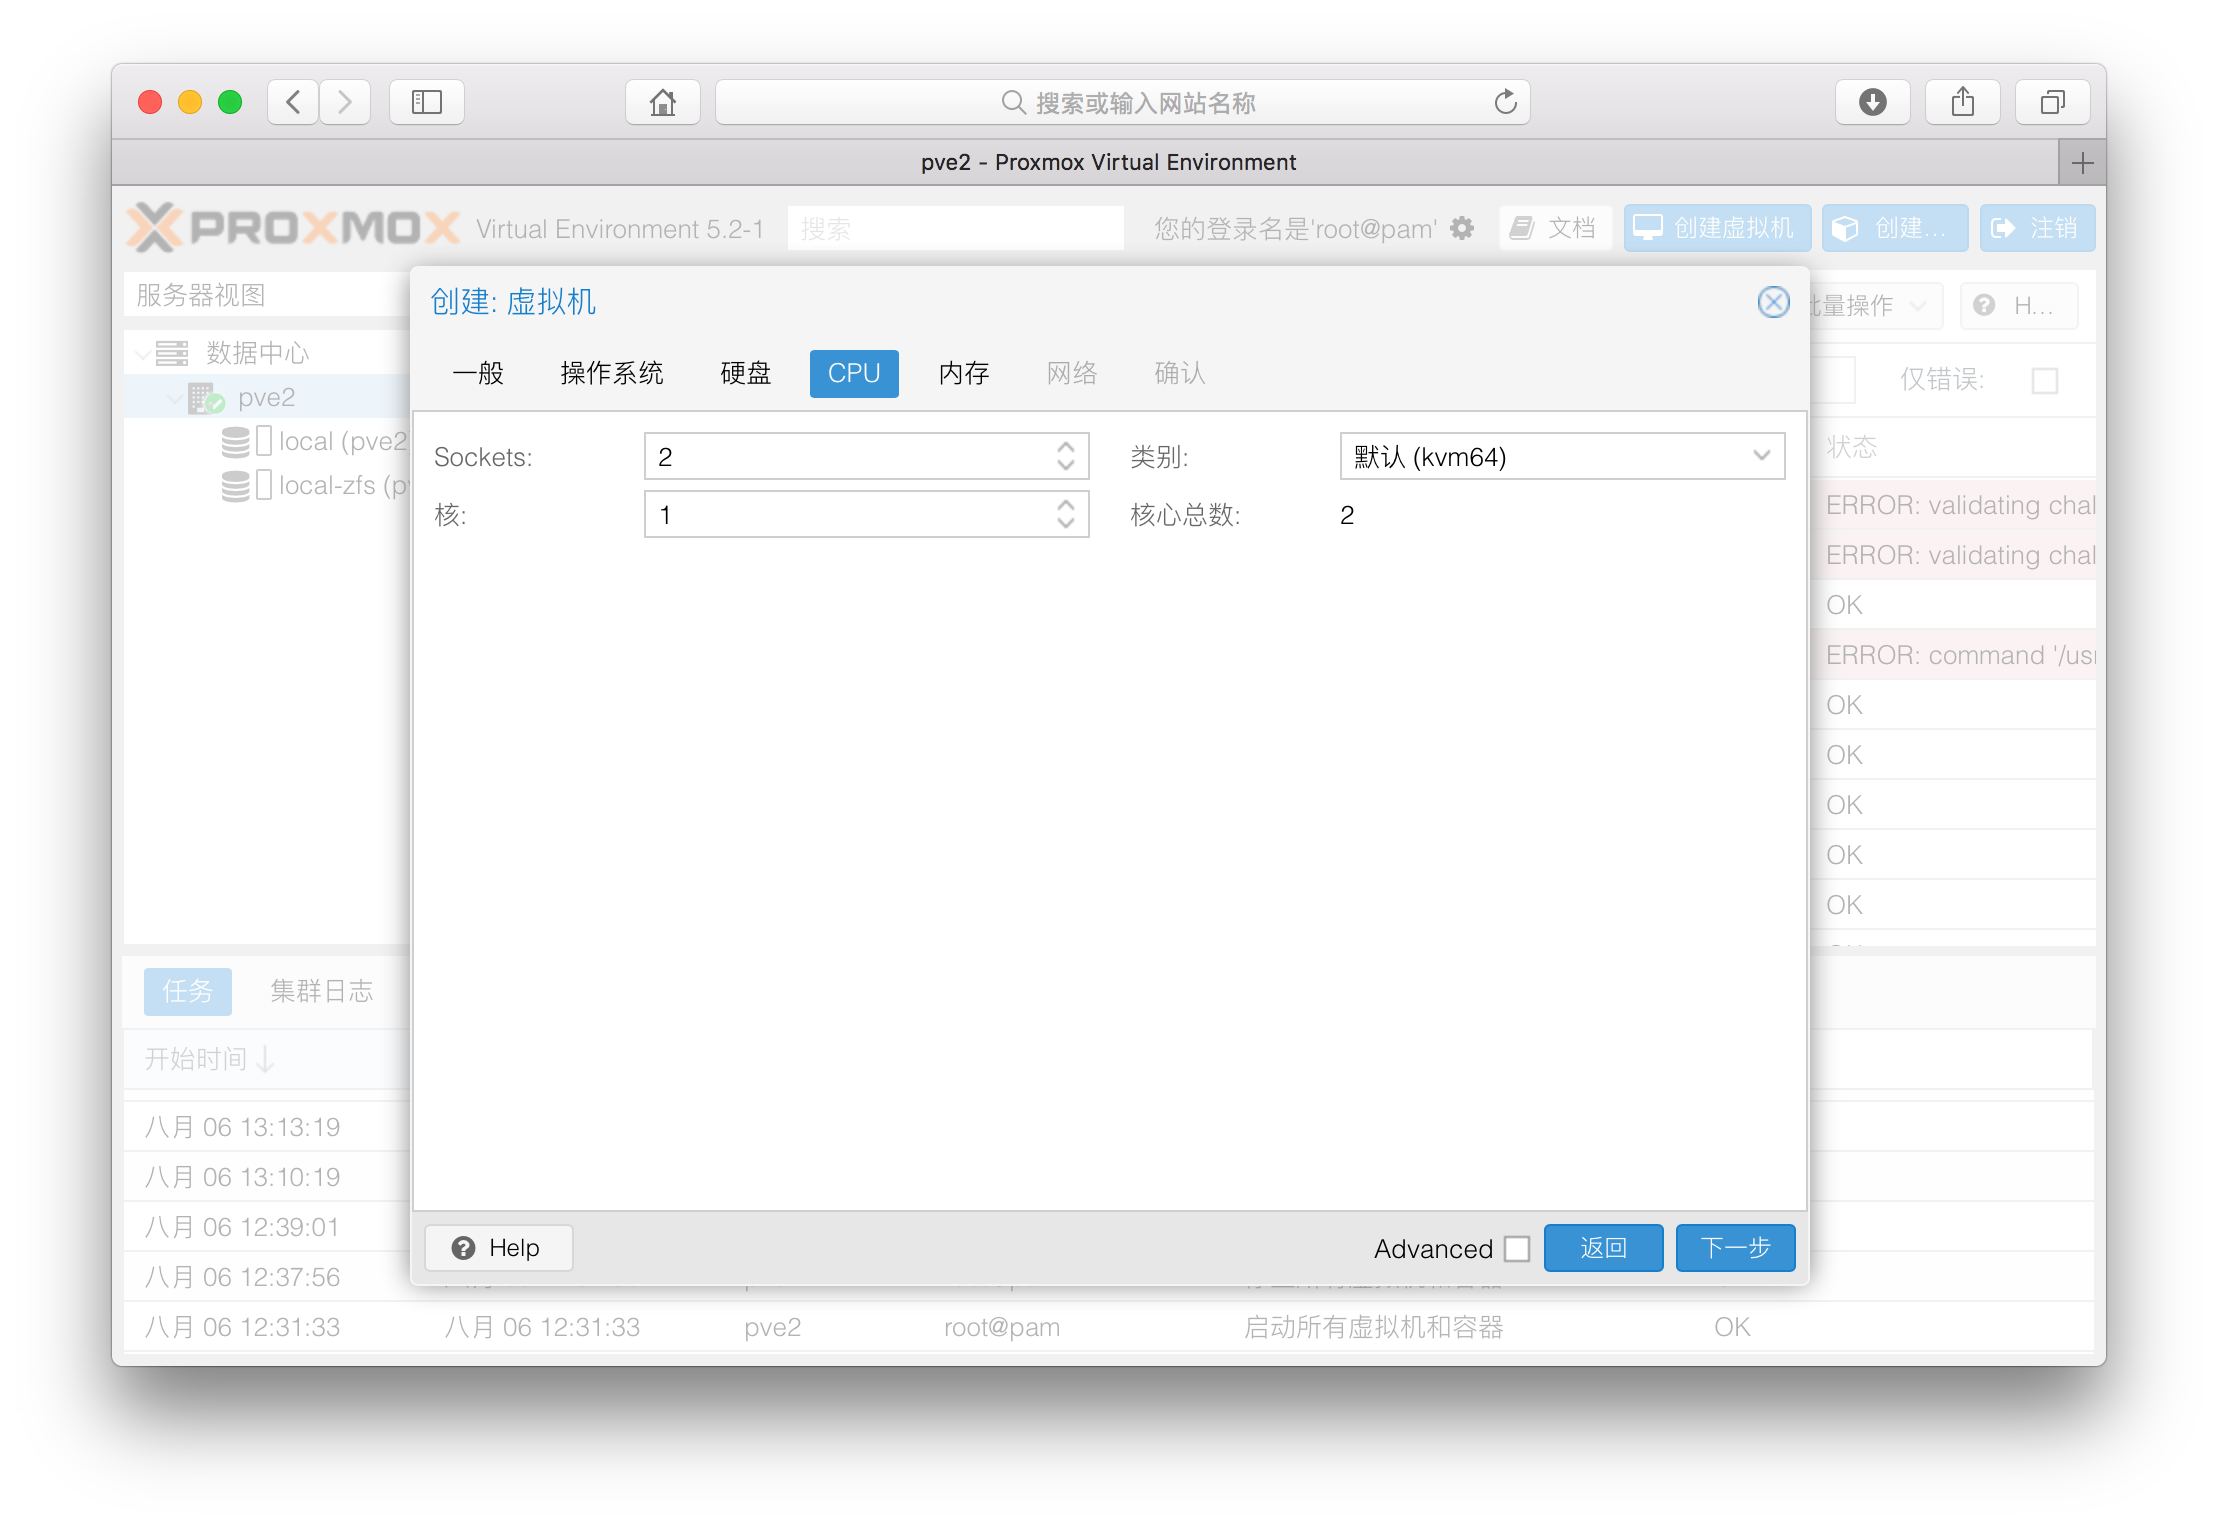
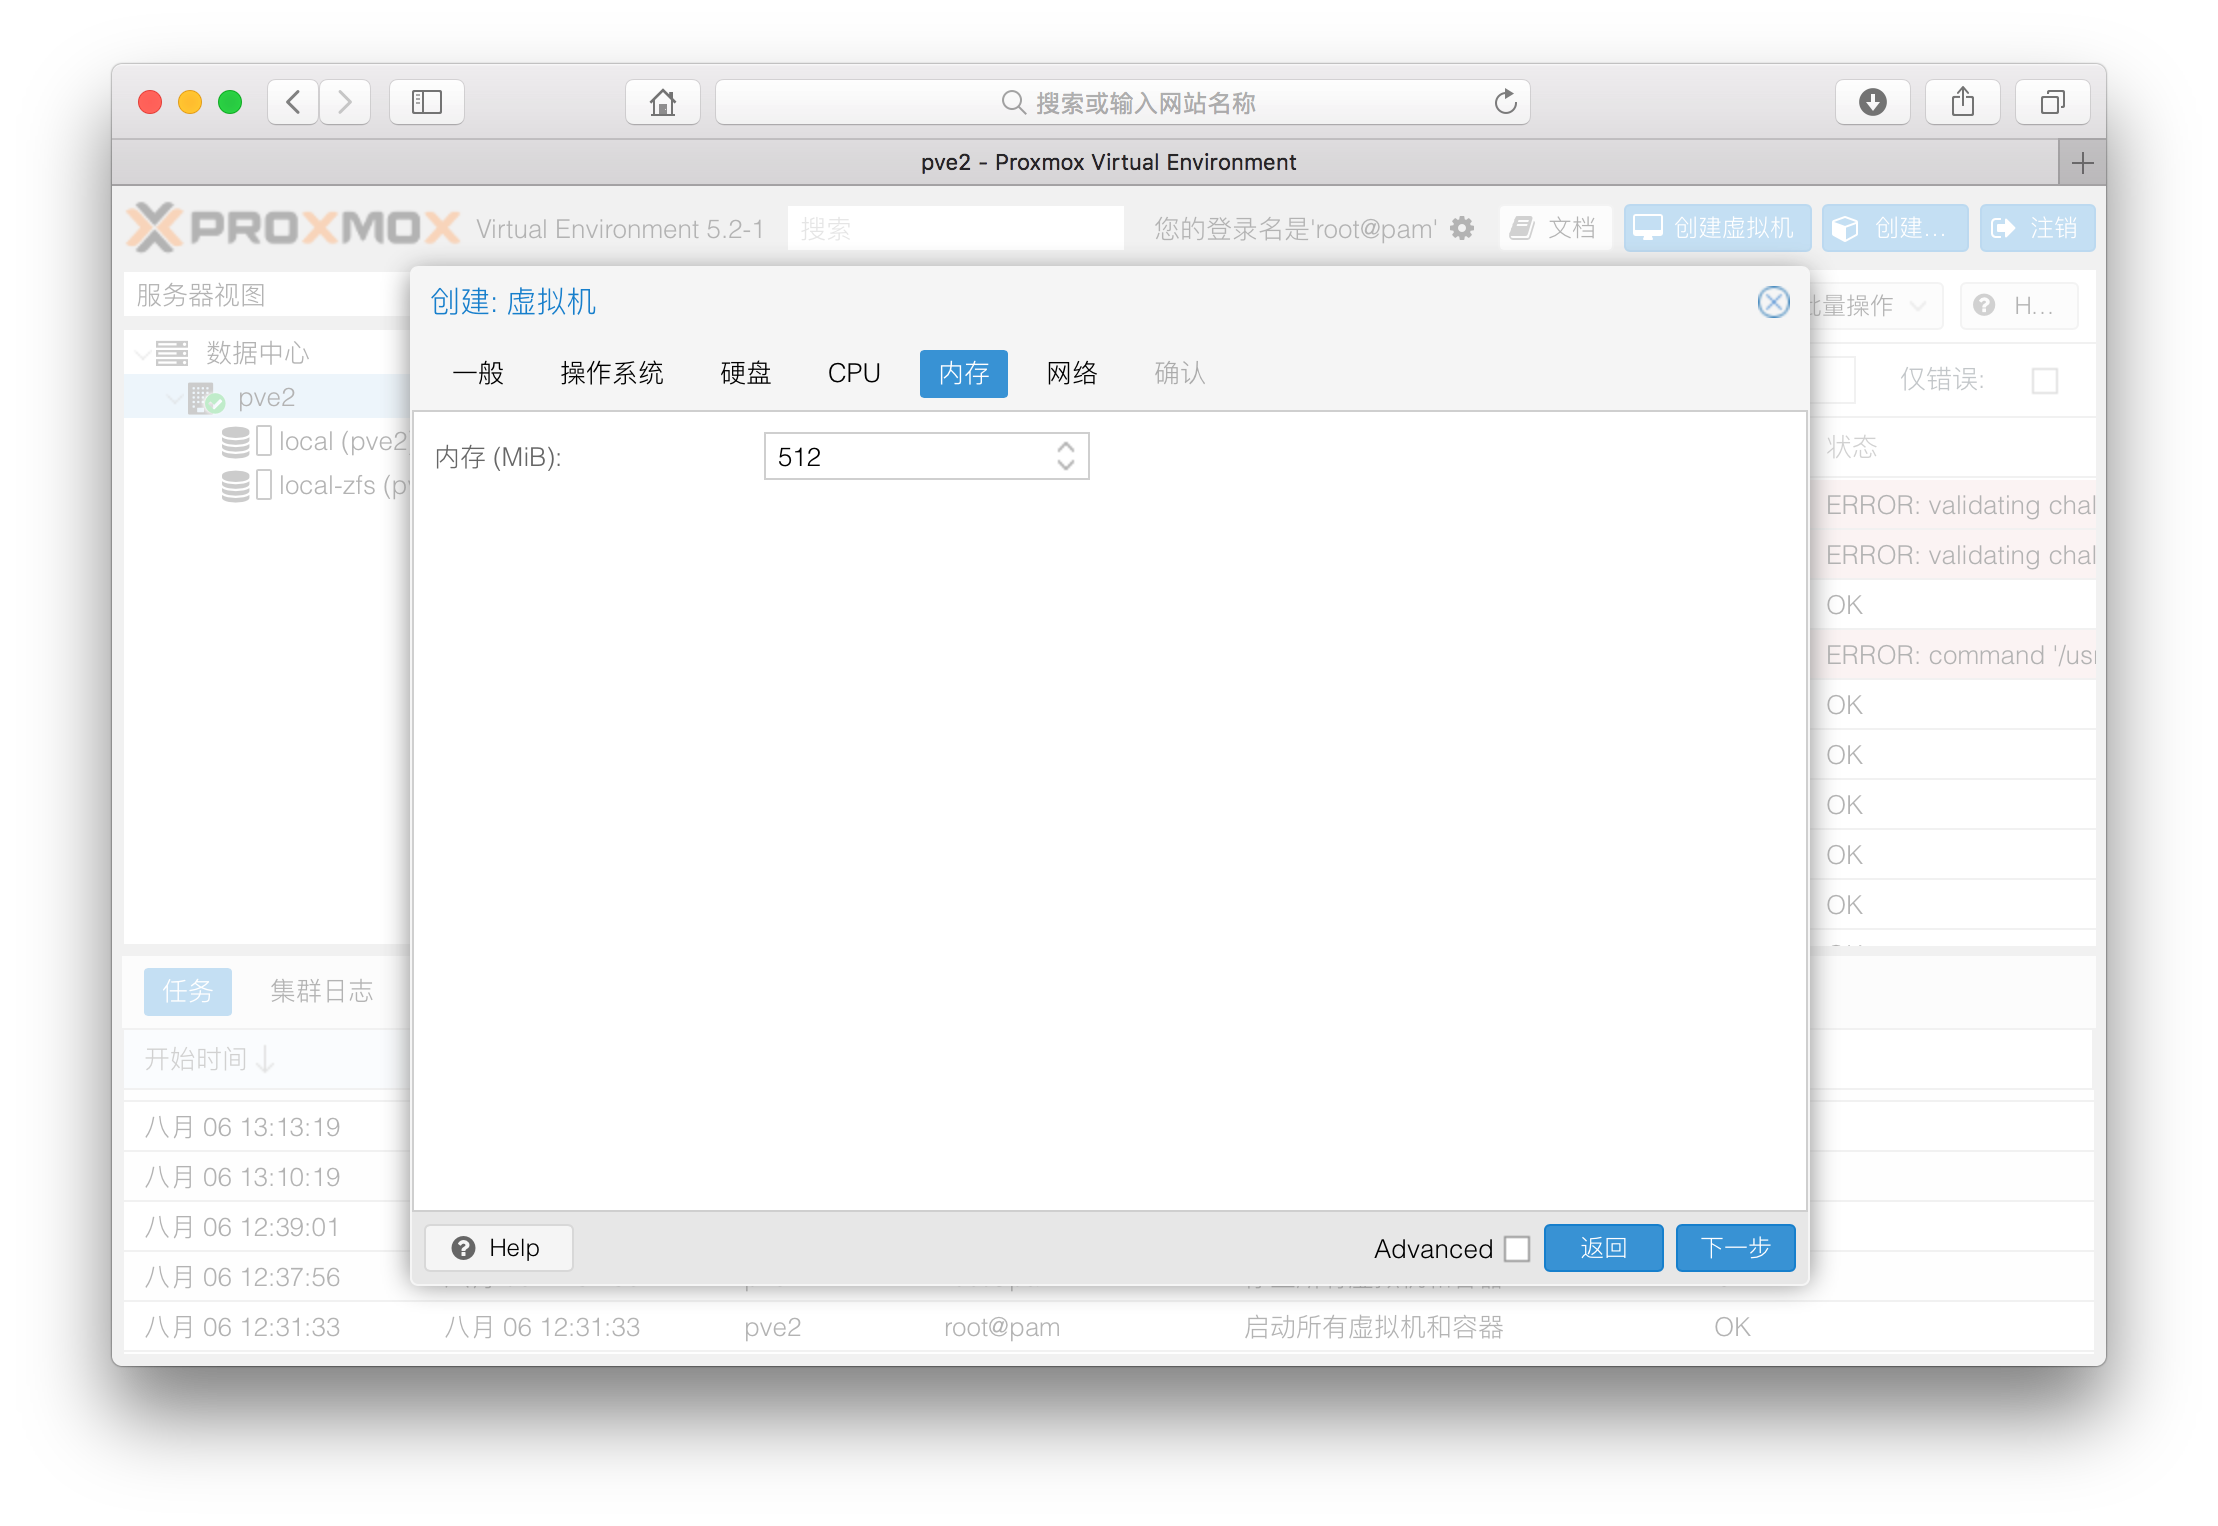
 Xpenology required 1 Core 1 Sockets and 256 MB RAM for basic linux kernel. But I recommend to use at less 1 Core 2 Sockets and 512 MB RAM in this case.
After these setting. Press “Enter” to close and create this virtual machine.
Create Boot File for XPENOLOGY Virtual Machine
I will not use UEFI setting on PVE UEFI to configure this virtual machine.
So we should convert img boot file for virtual machine.
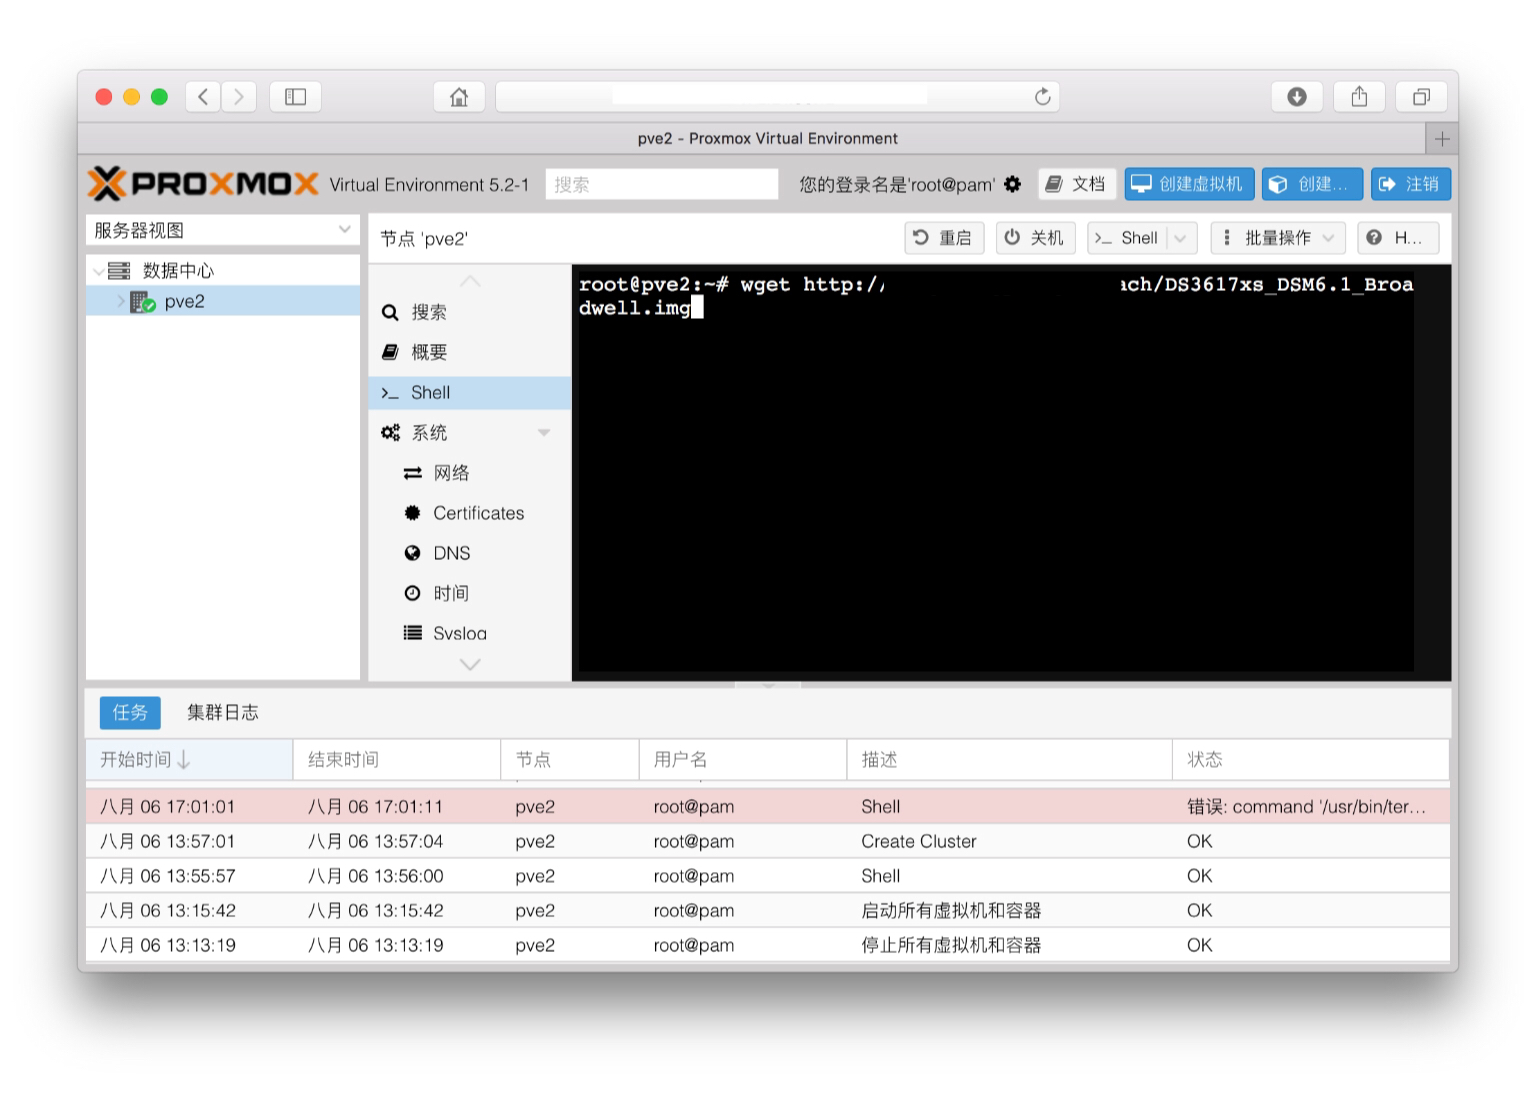
First, copy the file Image of XPENOLOGY 6 and img2kvm to root in your PVE node. I will use wget to download these files directly to my PVE. You can use ssh either sftp to copy these files. You can use this command for wget but you need to upload Image of XPENOLOGY 6 and img2kvm to the web server first.
wget http://file/path/to/download

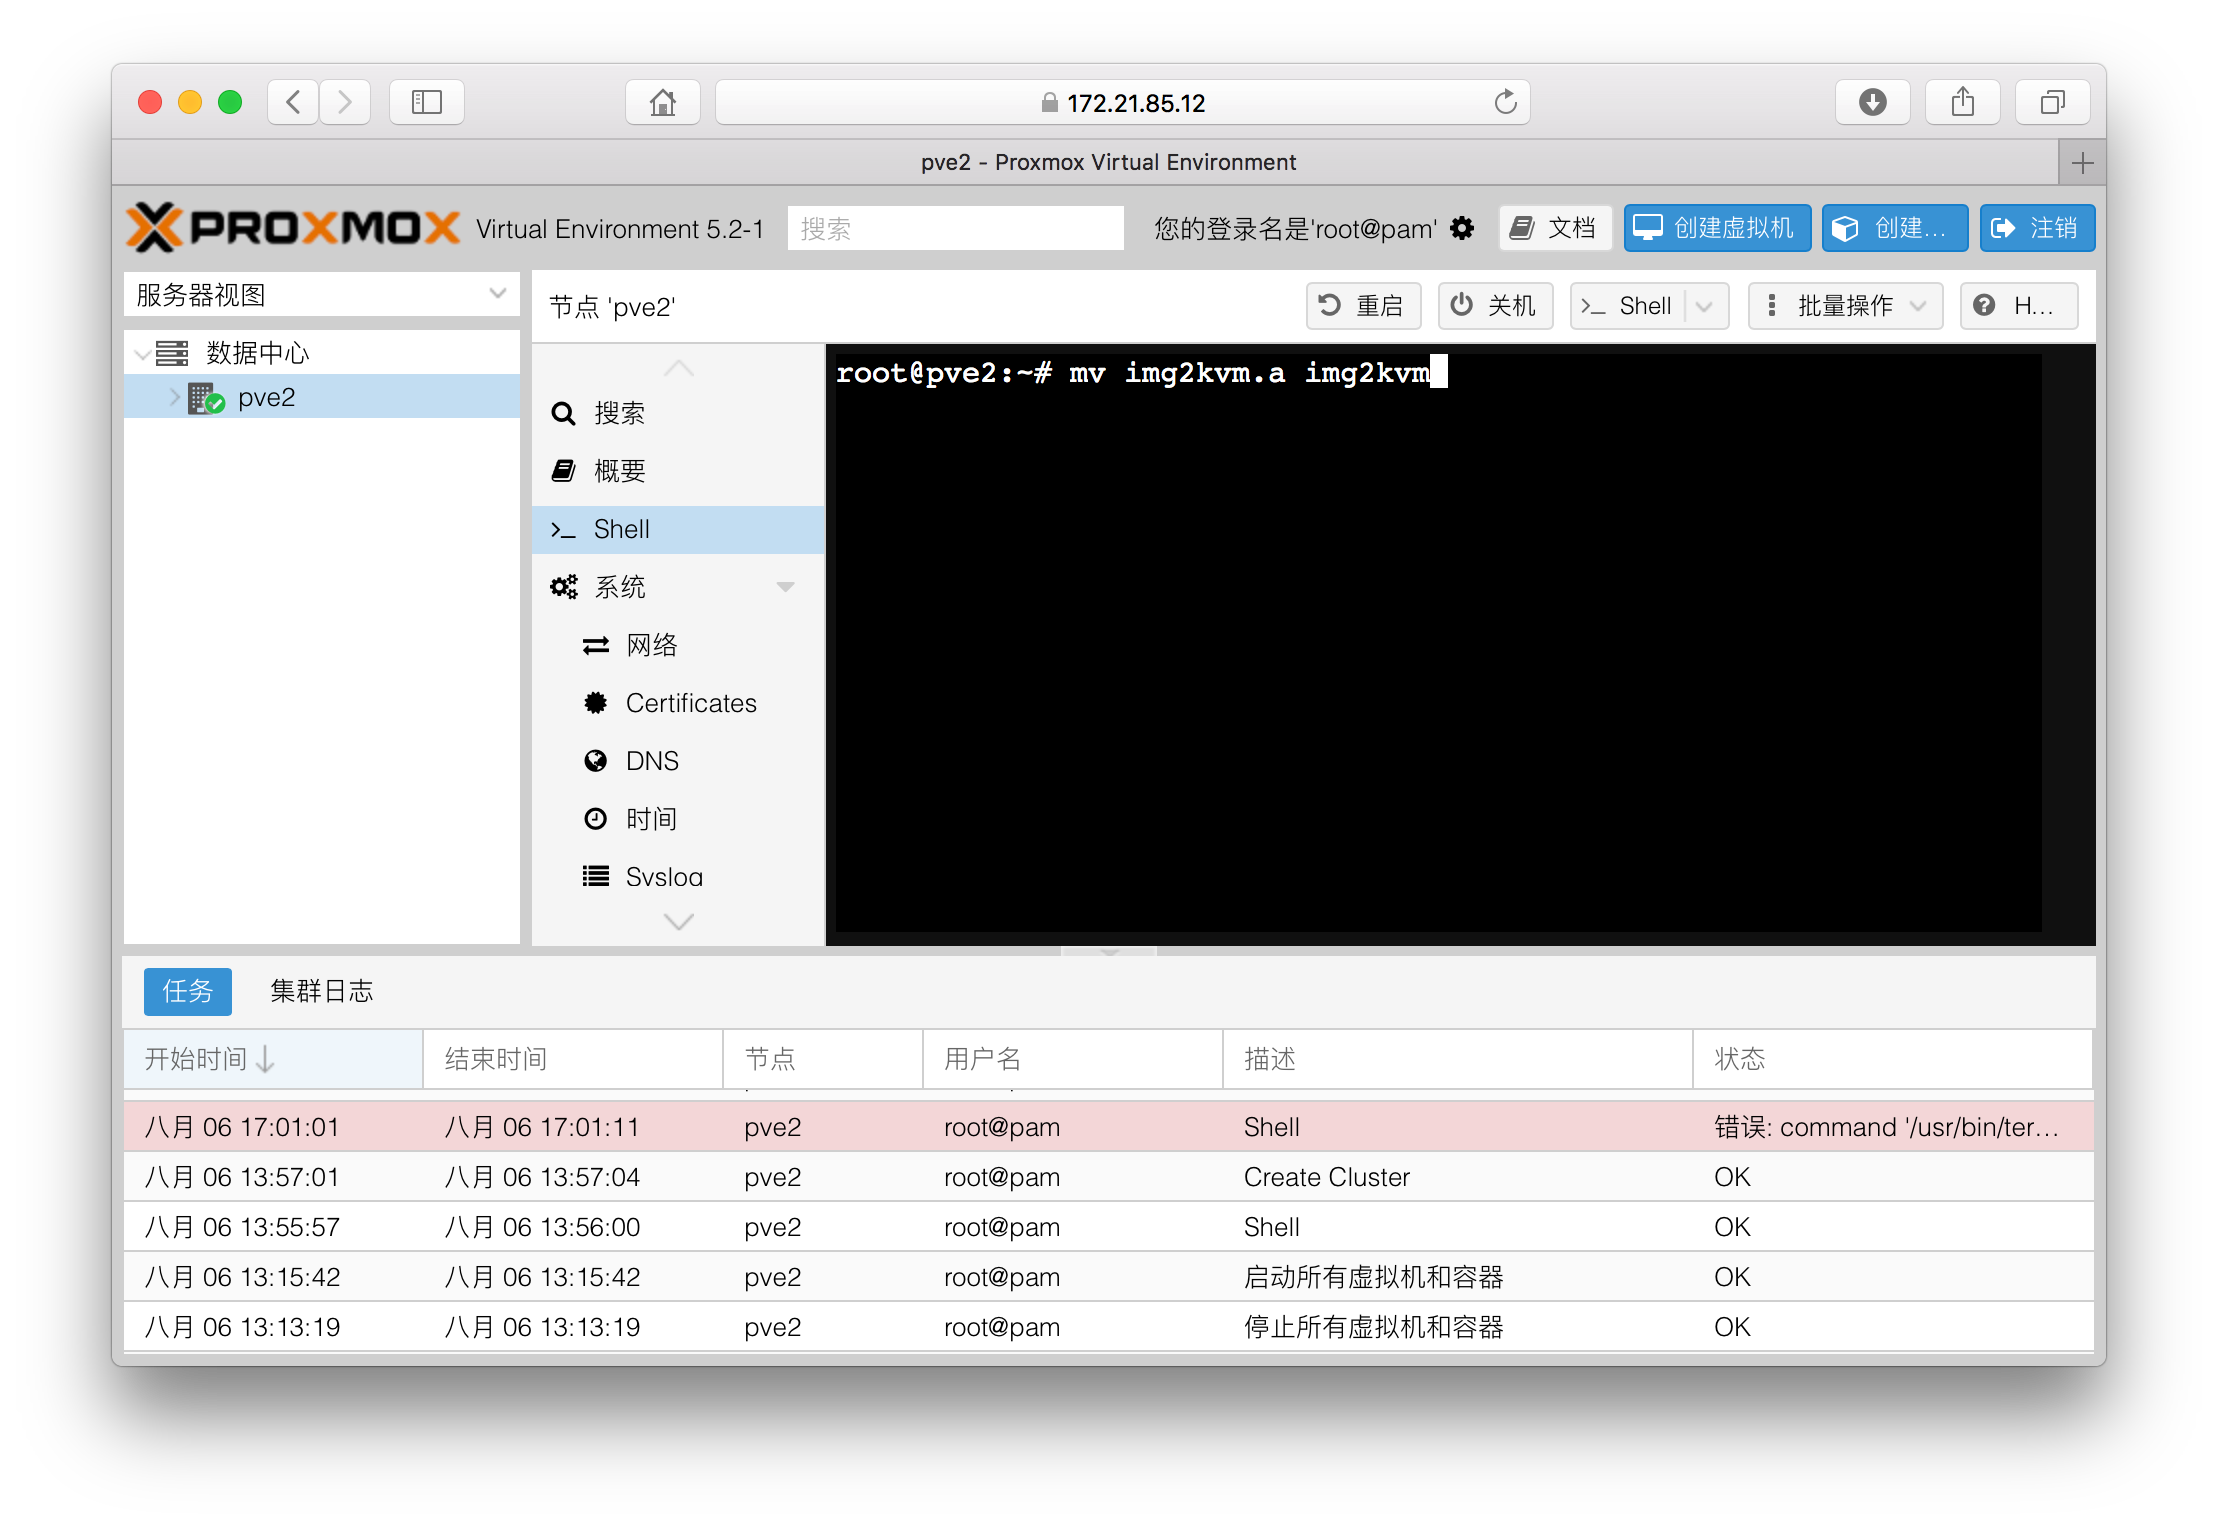
After you upload(get) imgkvm and DS3617xs_DSM6.1_broadwell.img the first thing we should do is change the name of imgkvm package. Use the following move command to change it.
mv img2kvm.a img2kvm
When these two files (imgkvm and DS3617xs_DSM6.1_broadwell.img) are ready, it is time to convert img file to kvm. This command use to give privilege to imgkvm script for changing system file.
chmod +x img2kvm

Convert img file to kvm file.
Number 100 us my VMID, you should change VMID to fit the VMID of this machine.
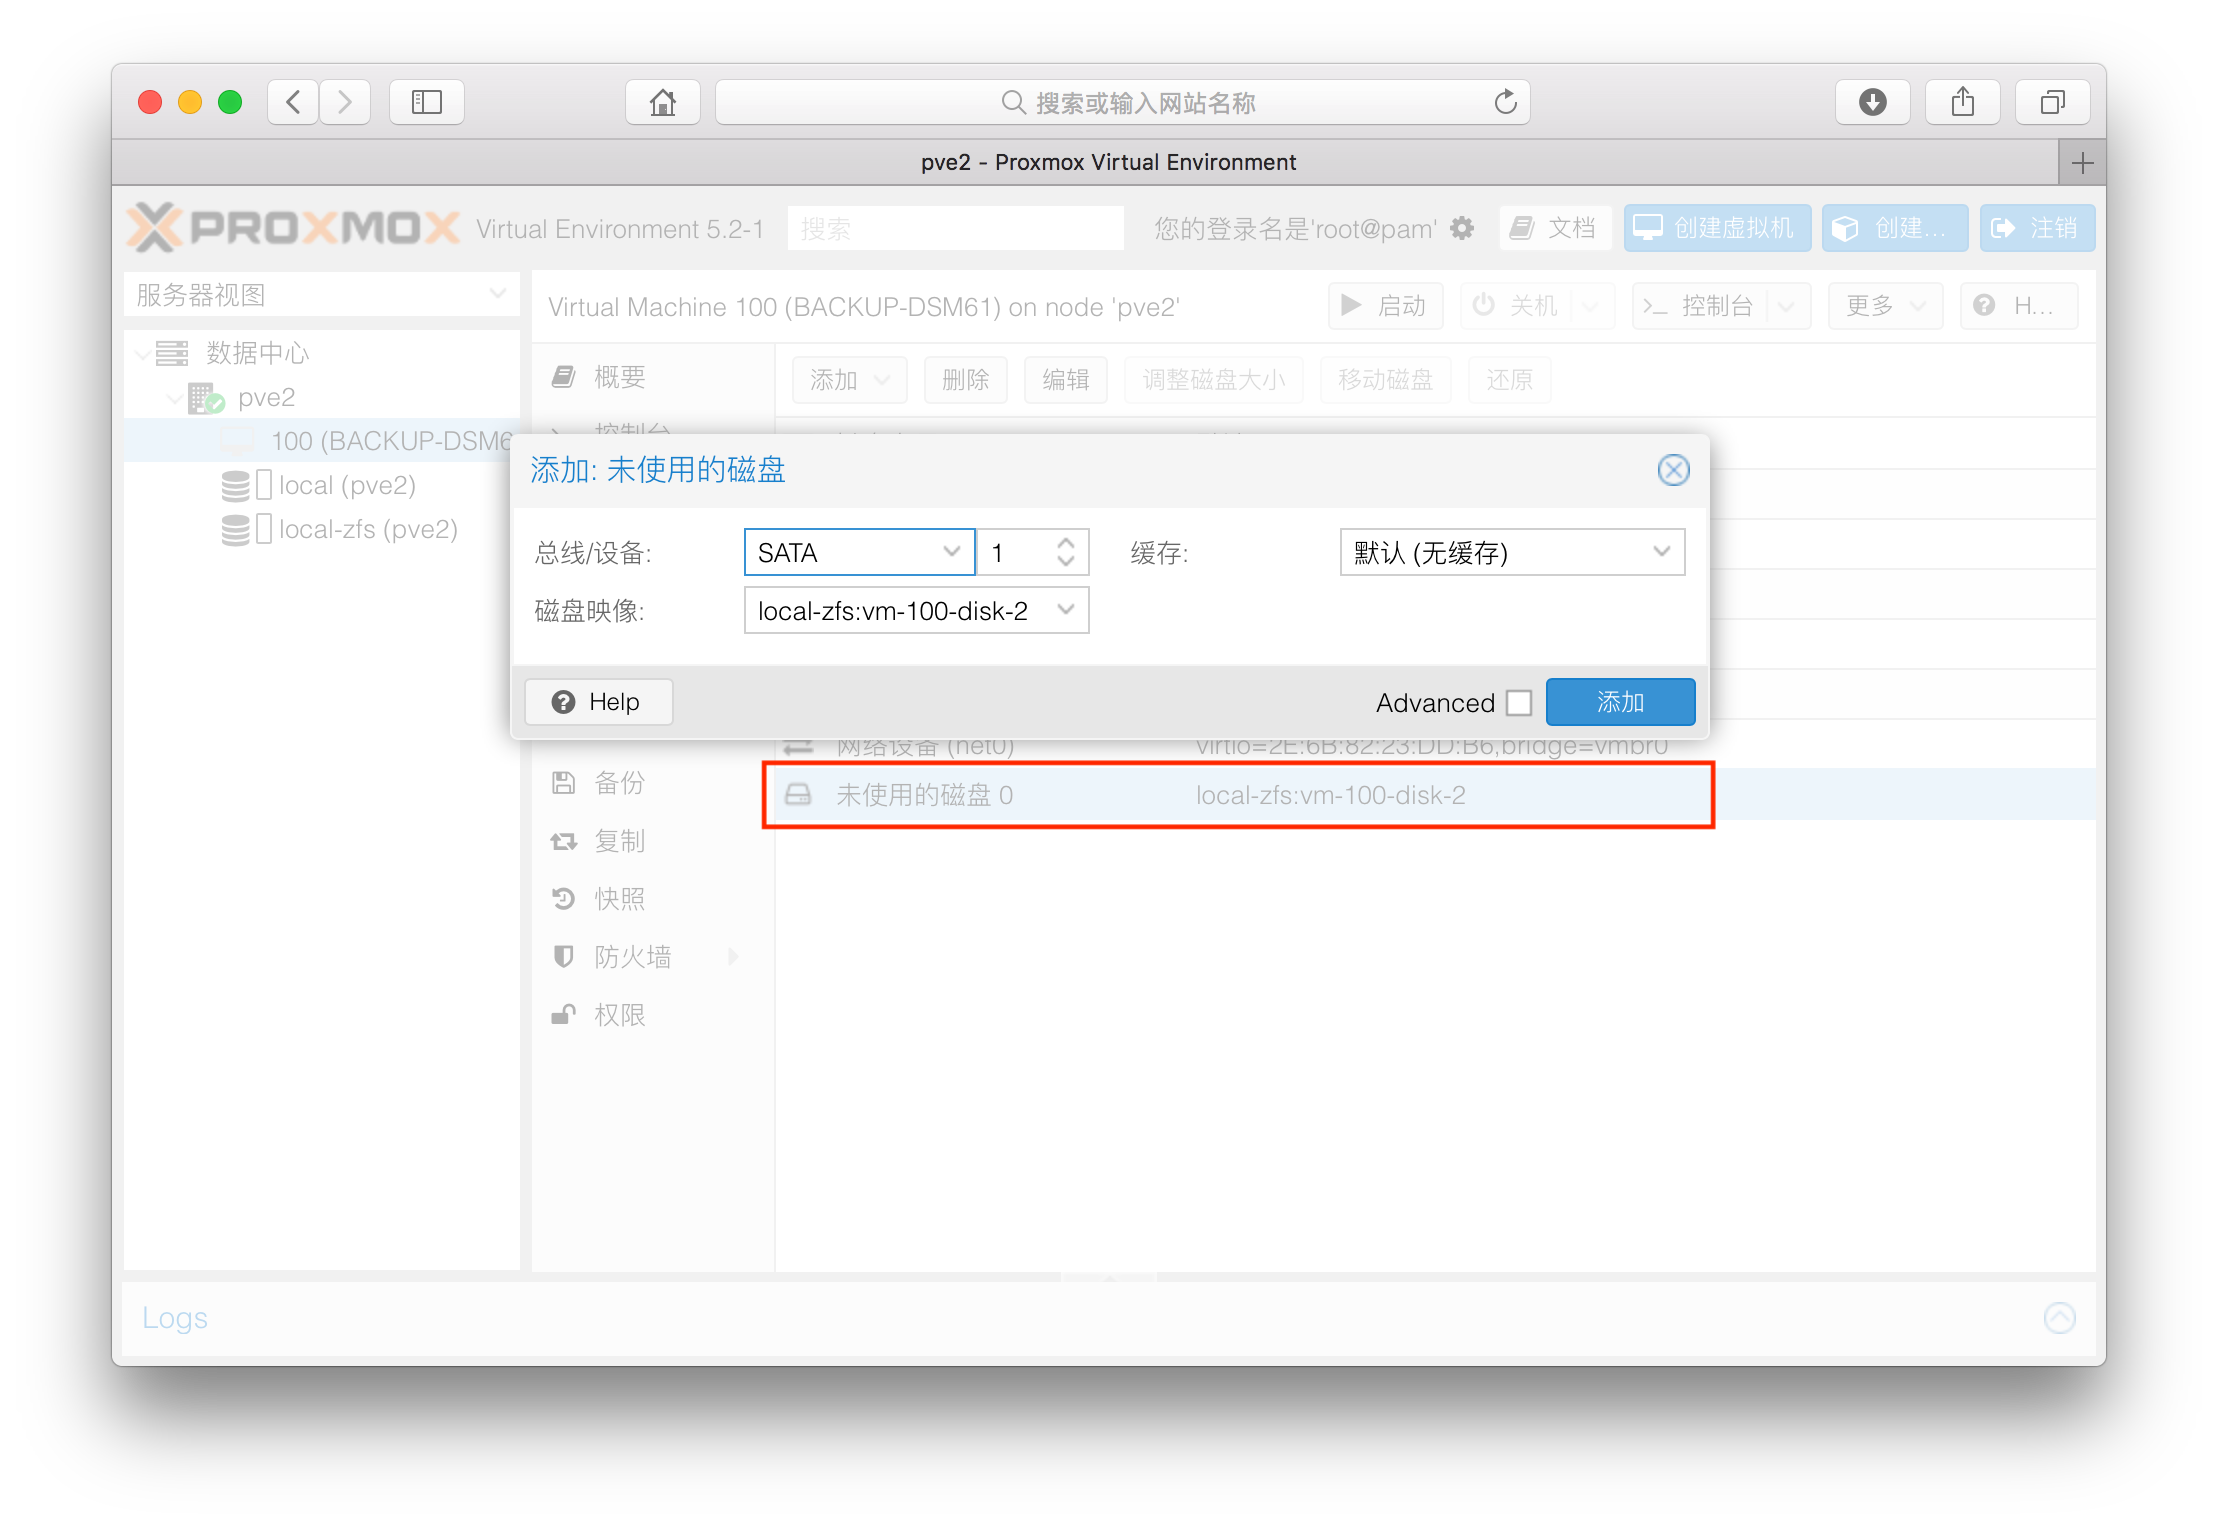
local-zfs is the format of your storage hard disk which located at the red box of the left side, if you are using local-lvm you can either left empty or type local-lvm.
./img2kvm DS3617xs_DSM6.1_Broadwell.img 100 vm-100-disk local-zfs
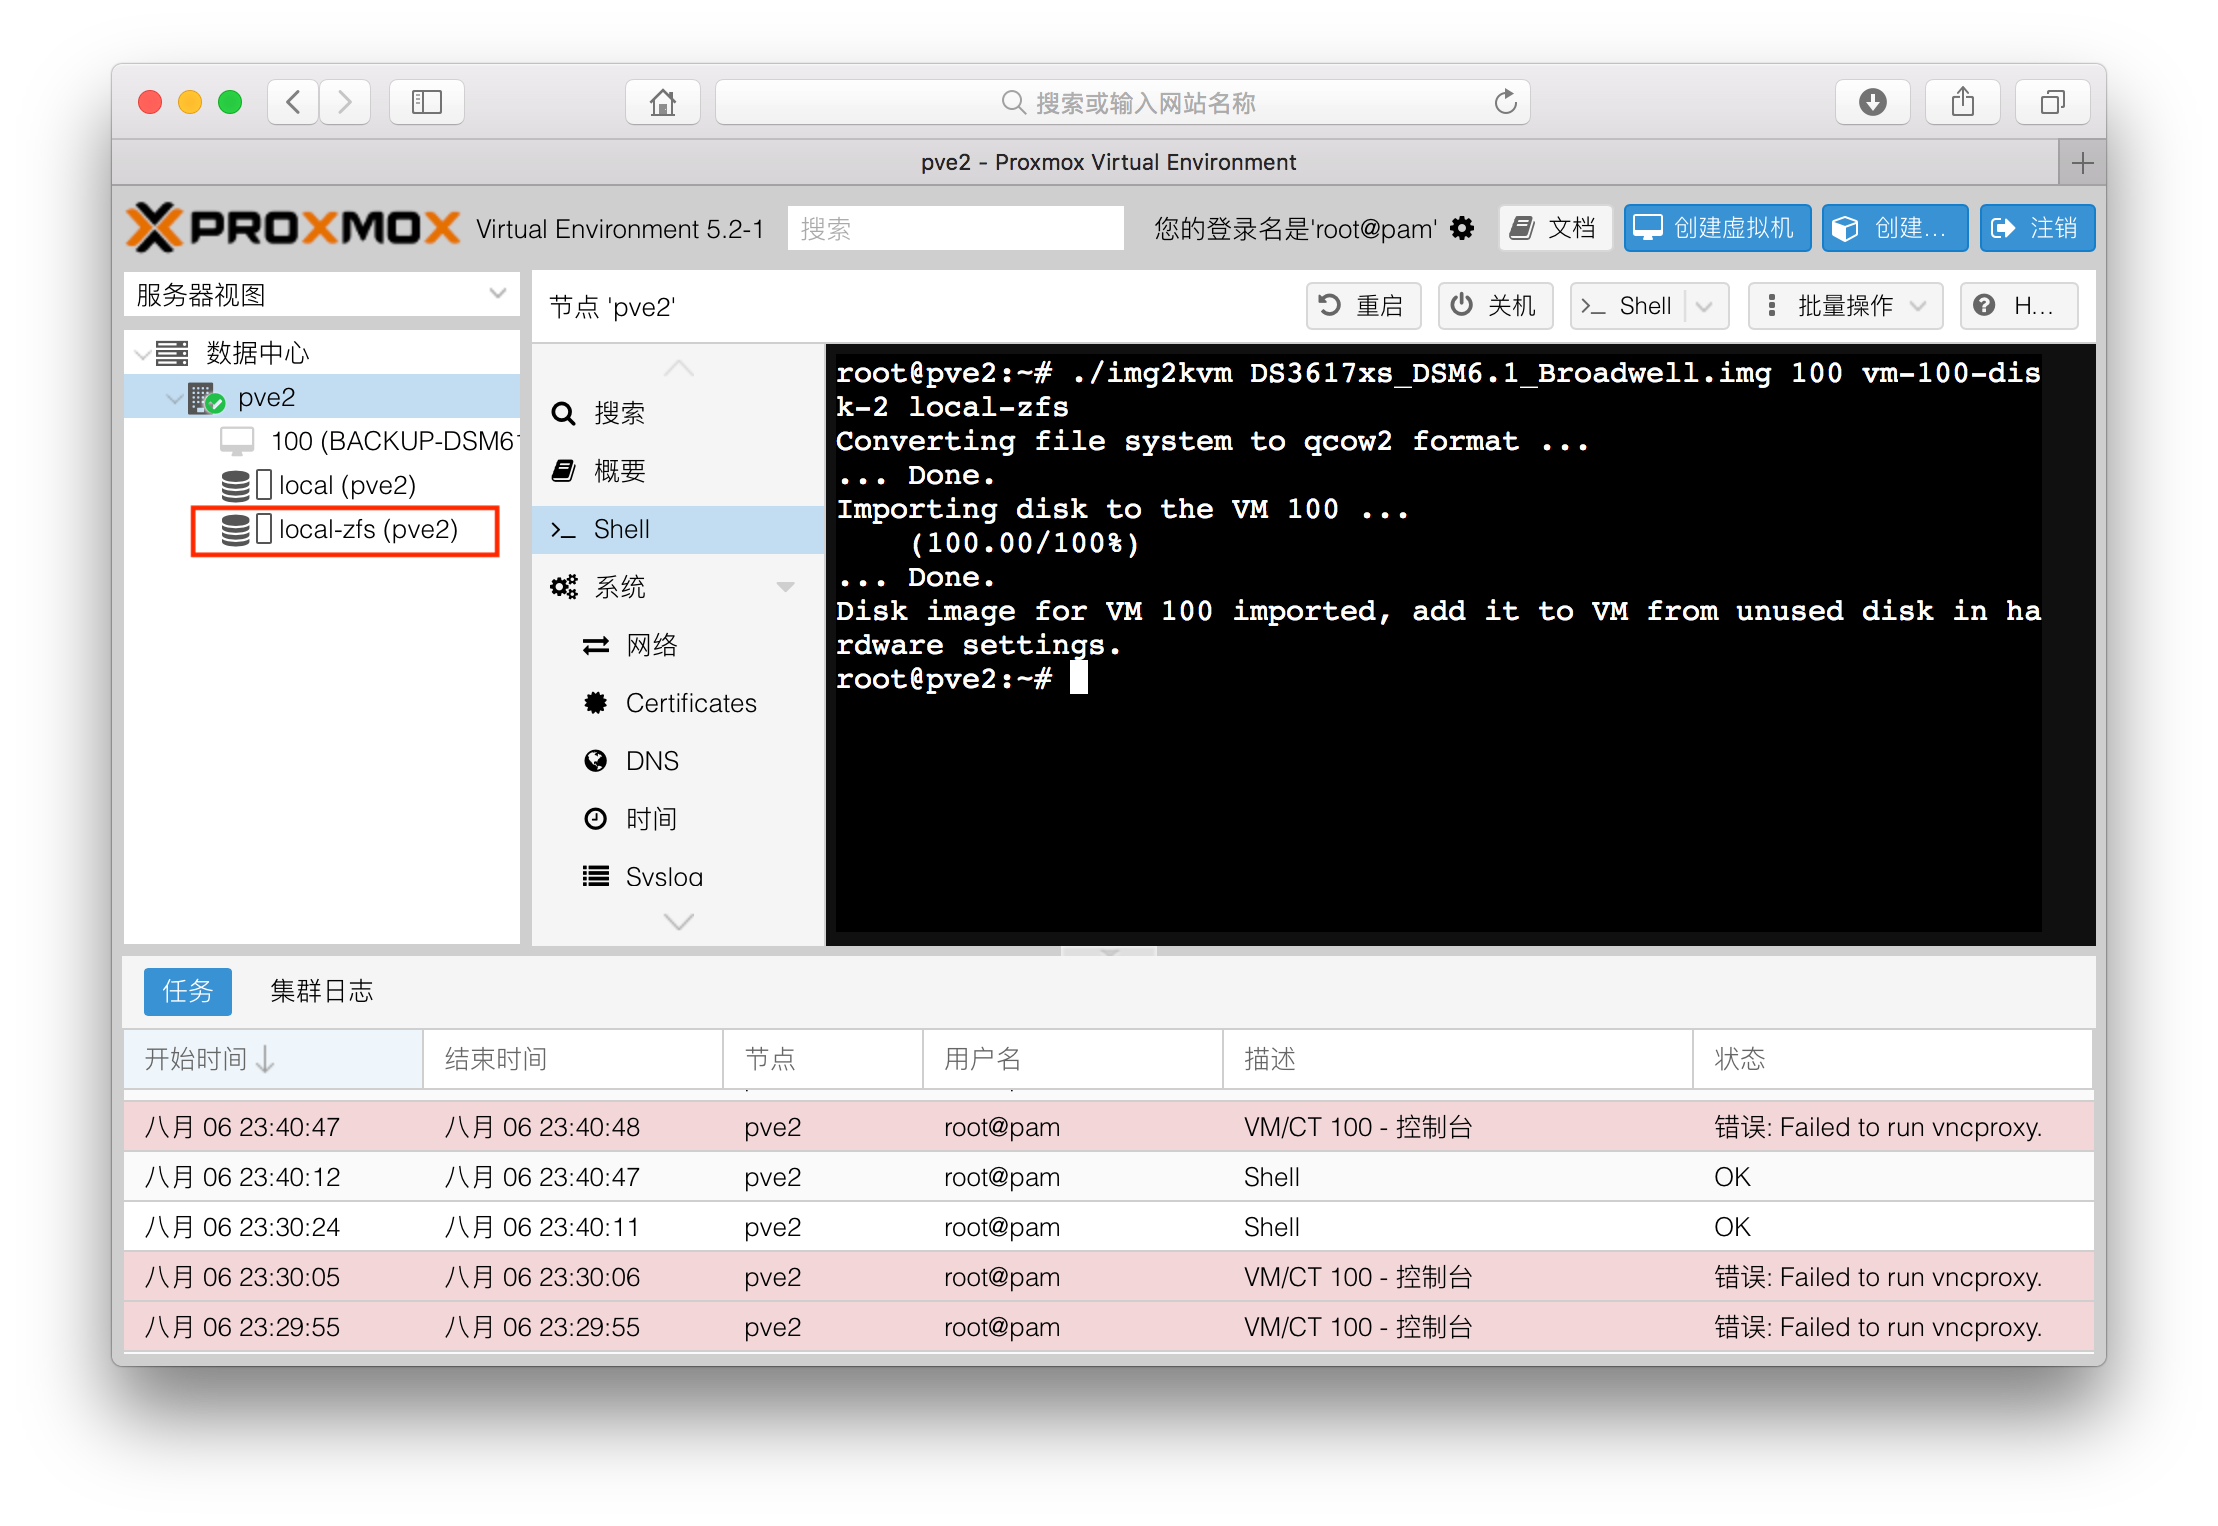
At last, you will see there is an unused hard disk in the virtual disk page. Click it to create a hard drive for system booting.
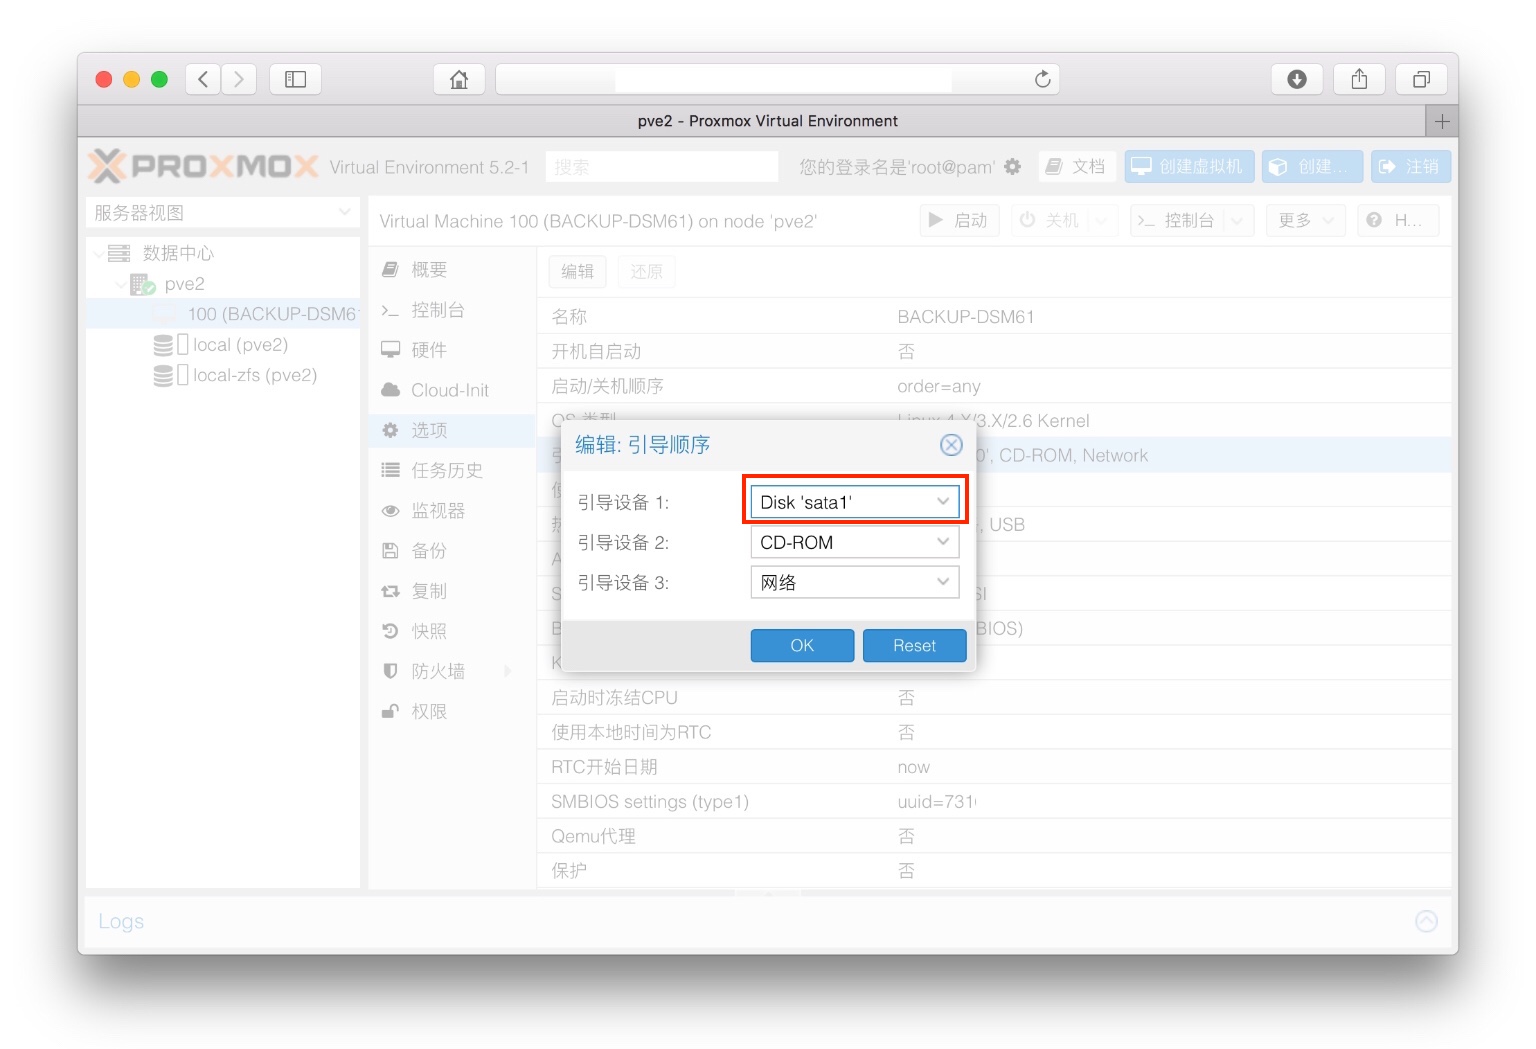
 After this, you should switch to other option settings, and set the boot sequence to SATA boot first.
 After that start your Xpenology virtual machine and use find.synology.com or Synology assistant to find you virtual machine IP.
2 則留言
This works like a charm with Proxmox 6 using zfs! The EFI booting problem with zfs is really a pain to now. Thanks for the instrustions which gives an easy way to figure out what to do with zfs, though there’s no details on purpose of each step.
Bootloader 是成敗的重中之重
昨天用最集矩jun boot在proxmox中,完全沒有反應
還吃了30%的CPU